Inspired Lifestyle Hub
  • Home
  • Crafts
    • 10 Cool Summer Door Wreaths to Welcome Guests in Style
  • Fashion
  • Food
    • 8 Must-Have Items for a Backyard BBQ Setup
    • 10 Easy Grilling Ideas to Try This Summer: Quick, Budget-Friendly Recipes for Perfect Cookouts
  • Lifestyle
    • 10 Chic Outdoor Patio Decor Ideas for Summer Gatherings
  • Summer
  • Home Organization
Author

Emma Sinclair

Image of Emma Sinclair
Emma Sinclair

Emma Sinclair is a Travel Entrepreneur based in Connecticut, USA. She is passionate about exploring the world and helping others embrace adventure. Alongside her travel ventures, she sells handcrafted items inspired by global cultures. In her spare time, she enjoys running, healthy eating, traveling, reading, and gardening, embodying a lifestyle of exploration and creativity.

Grilling

8 Must-Have Items for a Backyard BBQ Setup

by Emma Sinclair July 9, 2025
written by Emma Sinclair
The backyard BBQ has evolved far beyond simple burgers and hot dogs. In 2025, outdoor cooking has become a sophisticated culinary art form that combines exceptional food with memorable social experiences. Whether you’re hosting intimate family gatherings or larger neighborhood celebrations, having the right backyard bbq setup can transform your backyard into the ultimate outdoor entertainment destination.
Creating the perfect outdoor bbq setup isn’t just about throwing some meat on a grill—it’s about thoughtful planning, quality equipment, and attention to detail that elevates every aspect of your outdoor cooking experience. From precision temperature control to stylish serving solutions, the modern bbq setup at home demands both functionality and flair.

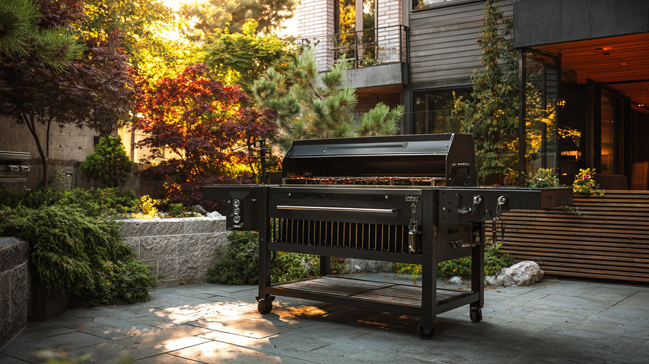
1. High-Performance Grill: The Heart of Your BBQ Setup

Your grill serves as the centerpiece of any successful bbq setup, and choosing the right one can make or break your outdoor cooking experience. The current trend shows a fascinating comeback of charcoal grills, driven by their superior flavor profiles and the authentic cooking experience they provide.

Charcoal Grills: The Flavor Champions

Charcoal grills have experienced a remarkable renaissance, with manufacturers introducing innovative features that combine traditional cooking methods with modern convenience. Today’s high-performance charcoal grills feature adjustable grates, electric ignition systems, and built-in rotisserie capabilities that were once exclusive to gas models.
The smoky flavor that charcoal imparts simply cannot be replicated by other fuel sources, making it the preferred choice for serious BBQ enthusiasts who prioritize taste above convenience.

Gas Grills: Convenience Meets Performance

For those who value ease of use and consistent results, gas grills remain an excellent choice for any bbq setup ideas you’re considering. Modern gas grills offer precise temperature control, quick startup times, and multiple cooking zones that allow you to prepare various foods simultaneously.

Electric Grills: The Urban Solution

Electric grills have gained popularity among urban dwellers with limited outdoor space or strict fire regulations. While they may not provide the same flavor profile as charcoal, they offer clean operation and consistent results.

Luxury Recommendations

For serious enthusiasts looking to invest in premium equipment, consider the Lion Premium Built-In Grill L75623 or the Lynx Sedona L600R. These professional-grade options offer restaurant-quality performance and durability that justifies their investment.

Trending Portable Options

The Fyr Grill Pro has gained significant attention for its portable design featuring asado-style cooking and integrated kebab station capabilities, perfect for those who want versatility in their outdoor bbq setup.
High-performance charcoal grill with adjustable grates and rotisserie feature in modern backyard setting"

2. Smart Wireless Thermometer: Precision Cooking Made Easy

Precision cooking has become non-negotiable in modern BBQ culture, and smart wireless thermometers represent one of the most significant technological advances in outdoor cooking. These devices eliminate the guesswork from grilling while allowing hosts to socialize instead of constantly monitoring their food.

The Technology Advantage

Modern wireless thermometers connect to smartphone apps, providing real-time temperature monitoring and alerts when your food reaches the perfect doneness. This technology ensures consistent results every time, regardless of your experience level.

Top Product Recommendation

The ThermoWorks RFX Wireless Thermometer stands out in the market, capable of handling temperatures up to 1000°F with seamless app integration. This device allows you to monitor multiple pieces of meat simultaneously while maintaining the perfect internal temperature for each cut.

Practical Benefits

    • Monitor temperatures from anywhere in your backyard
    • Set custom alerts for different doneness levels
    • Track cooking progress without opening the grill
    • Maintain optimal temperatures for various meat types

3. Essential BBQ Tools Set: Your Culinary Arsenal

No bbq setup is complete without a comprehensive set of high-quality tools designed specifically for outdoor cooking. The right tools not only improve your cooking results but also enhance safety and efficiency throughout the grilling process.

Must-Have Tools

Heavy-Duty Tongs: Look for 16-18 inch tongs with secure grips and heat-resistant handles. Stainless steel construction ensures durability and easy cleaning.
Wide Spatula: A extra-wide spatula with beveled edges makes flipping burgers and delicate fish fillets effortless while maintaining food integrity.
Meat Fork: Essential for handling large roasts and whole chickens, a quality meat fork provides the leverage needed for safe food manipulation.
Heat-Safe Serving Tray: Stainless steel or ceramic trays that can withstand high temperatures serve as convenient staging areas for cooked foods.
Grill Cleaning Brush: Regular maintenance extends grill life and prevents flavor contamination between different foods.
Heat-Resistant Gloves: Silicone or aramid fiber gloves protect hands during high-temperature cooking and equipment adjustment.

Material Considerations

Stainless steel tools offer superior durability and heat resistance, while silicone-handled options provide comfortable grips that remain cool during extended cooking sessions. Avoid tools with plastic components that may melt or warp under high heat.

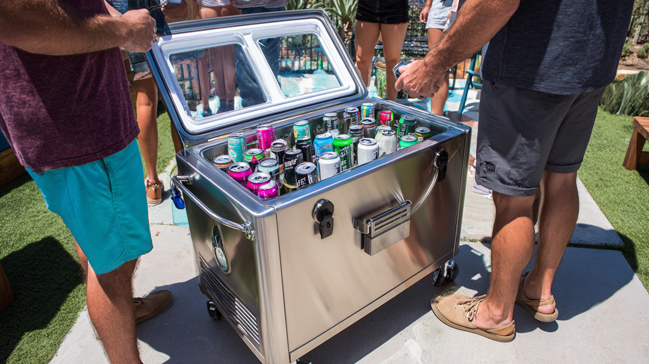
4. Cooler or Beverage Station: Refreshment Command Center

An effective cooling solution serves multiple purposes in your bbq setup at home, keeping beverages cold, preserving perishable ingredients, and providing additional prep space when needed. The key is selecting a solution that matches both your functional needs and aesthetic preferences.

Functional Requirements

Your cooling solution should maintain safe temperatures for at least 4-6 hours, accommodate various container sizes, and provide easy access for guests. Consider models with built-in drainage systems to prevent water accumulation and potential contamination.

Styling Considerations

Rolling coolers offer mobility and convenience, allowing you to reposition your beverage station based on crowd flow and weather conditions. Alternatively, rustic ice-filled galvanized tubs create an attractive vintage aesthetic while providing excellent cooling performance.

Enhanced Features

Look for coolers that include integrated bottle openers, cup holders, or even cutting board surfaces that transform your cooling solution into a multi-functional prep station.
Stylish rolling cooler with built-in bottle opener serving as outdoor beverage station during BBQ party

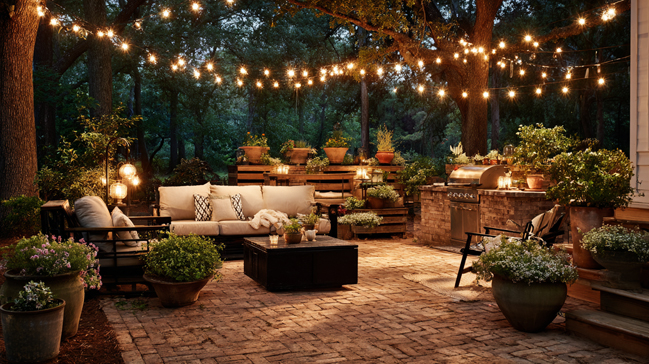
5. Outdoor Shelter: Weather Protection and Comfort

Creating a comfortable outdoor cooking environment requires protection from sun, wind, and unexpected weather changes. Outdoor shelters have evolved into sophisticated design elements that enhance both functionality and aesthetic appeal of your korean bbq setup or traditional American-style arrangements.

Gazebo Advantages

Portable gazebos offer immediate weather protection with minimal installation requirements. Modern designs feature wind-resistant construction and UV-protective canopies that create comfortable cooking and dining environments.

Pergola Benefits

Permanent pergola structures provide long-term value and can be customized with integrated lighting, climbing plants, and fire-resistant materials. These structures create defined outdoor rooms that enhance property value while improving functionality.

Design Integration

Position shelters to account for prevailing wind directions and natural sun patterns throughout the day. This strategic placement maximizes comfort and cooking efficiency while creating natural gathering spaces for guests.

Lighting Enhancement

Weather-resistant string lights or integrated LED systems extend usable hours and create inviting ambiance that transforms your bbq setup from day to evening entertaining.

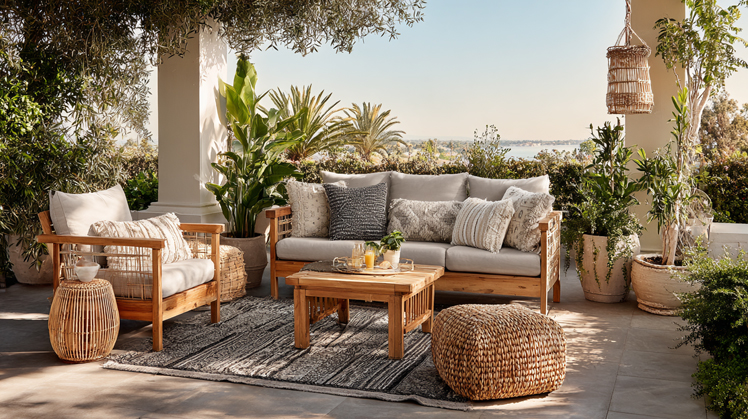
6. Prep Space & Serving Surfaces: Organized Efficiency

Adequate preparation and serving space distinguishes amateur setups from professional-quality outdoor cooking environments. Thoughtful workspace design improves food safety, cooking efficiency, and overall guest experience.

Essential Components

Multi-Level Prep Surfaces: Tiered preparation areas separate raw ingredients from cooked foods while maximizing limited space. Consider foldable options that expand surface area when needed and store compactly when not in use.
Professional Cutting Boards: Large, stable cutting boards with juice grooves prevent cross-contamination and provide secure cutting surfaces for various ingredients.

Modular Solutions

Modular outdoor kitchen components allow customization based on specific needs and available space. These systems can grow with your entertaining requirements and adapt to different event sizes.

DIY Alternatives

Custom-built BBQ tables designed specifically for your space and cooking style often provide better functionality than commercial alternatives while reflecting personal aesthetic preferences.

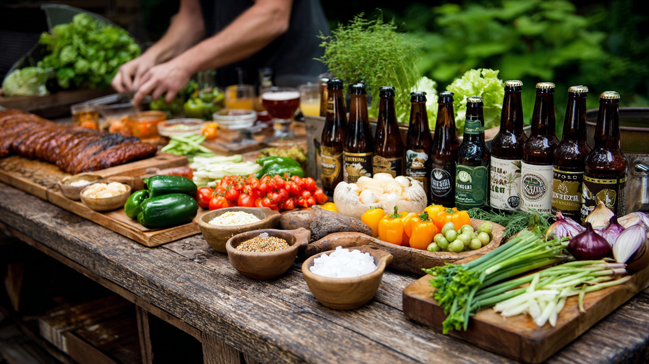
7. High-Quality Ingredients & Craft Beer Pairings: Elevating the Experience

The foundation of exceptional BBQ extends beyond equipment to encompass ingredient selection and beverage pairings that create memorable culinary experiences. Sourcing quality ingredients and understanding flavor combinations separates good BBQs from unforgettable ones.

Ingredient Selection

Premium Meats: Well-marbled cuts from local sources often provide superior flavor and texture compared to mass-produced alternatives. Establish relationships with local butchers who can provide specific cuts and preparation recommendations.
Signature Seasonings: Develop your own rub blends incorporating citrus zest, fresh herbs, and complementary spices that reflect your personal style and regional preferences.
Fresh Marinades: Beer-based marinades, citrus combinations, and herb-infused preparations add complexity and moisture that elevate simple proteins into restaurant-quality dishes.

Craft Beer Integration

Understanding beer and food pairings enhances the overall dining experience. Light lagers complement delicate fish and poultry, while robust stouts pair excellently with rich, smoky beef preparations.

Local Sourcing

Supporting local producers creates unique regional flavors while building community connections that can lead to exclusive access to specialty products and seasonal ingredients.
Fresh local ingredients and craft beer selection as part of a backyard bbq setup

8. Stylish Waste & Cleanup Solutions: Maintaining Order

Effective waste management and cleanup systems maintain the aesthetic appeal of your bbq setup while ensuring food safety and environmental responsibility. Well-planned cleanup solutions prevent messes from detracting from the entertaining experience.

Discrete Waste Management

Strategically positioned waste containers attached to shelter supports or concealed within decorative housings keep refuse out of sight while remaining easily accessible for guests and cleanup.

Cleaning Efficiency

Cleaning grills while they remain warm significantly reduces effort and time requirements. Long-handled brushes and heat-resistant gloves enable safe cleaning immediately after cooking when residue removal is most effective.

Environmental Considerations

Eco-friendly and compostable waste solutions align with growing environmental consciousness while potentially reducing waste disposal costs and environmental impact.

Organization Systems

Separate containers for recyclables, compostables, and general waste streamline cleanup while supporting sustainable practices that resonate with environmentally conscious guests.

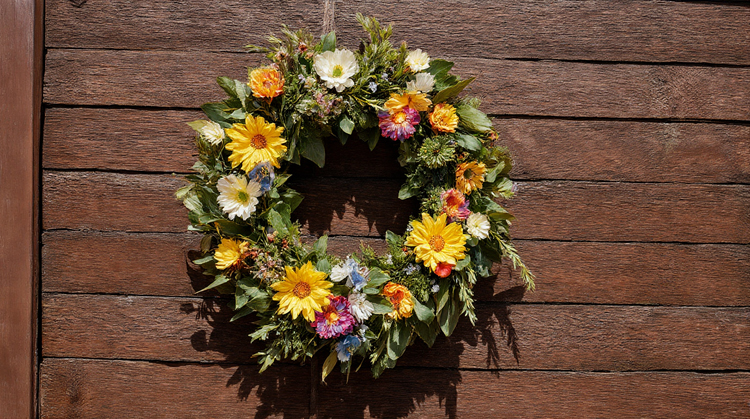
Bonus: Design & Ambiance Enhancers

Creating memorable BBQ experiences requires attention to atmospheric details that transform functional cooking spaces into inviting entertainment venues. These enhancements reflect personal style while improving guest comfort and enjoyment.

Lighting Solutions

String lights create warm, inviting atmospheres that extend entertaining hours into evening. Solar-powered options provide sustainable illumination without requiring electrical connections.

Audio Integration

Weather-resistant speakers enable background music that enhances ambiance without overwhelming conversation. Wireless systems provide placement flexibility and easy control.

Natural Elements

Incorporating greenery through potted herbs or climbing plants softens hardscape elements while providing fresh ingredients for immediate use in cooking and drink preparation.

Comfort Additions

Outdoor rugs define spaces and add comfort underfoot, while themed decorations reflect personal interests and create conversation starters among guests.
Beautifully lit outdoor BBQ area with string lights, potted herbs, and comfortable seating arrangement
Creating the ultimate backyard BBQ setup requires thoughtful planning, quality equipment, and attention to details that enhance both functionality and atmosphere. These eight essential items provide the foundation for memorable outdoor cooking experiences that bring people together around exceptional food.
Investment in quality equipment pays dividends through improved cooking results, enhanced durability, and increased entertaining confidence. However, the most important element remains your passion for creating enjoyable experiences that reflect your personal style and hospitality.
Start with the basics and gradually expand your setup as your skills and entertaining requirements evolve. Remember that the best BBQ setups are those that reflect their owners’ personalities while facilitating the creation of lasting memories with family and friends.
Ready to transform your backyard into the ultimate outdoor cooking destination? Start planning your ideal BBQ setup today and discover how the right equipment and thoughtful design can elevate every gathering into an unforgettable experience.

Frequently Asked Questions

What’s the most important item for a beginner BBQ setup? A reliable thermometer is the most crucial tool for beginners. It ensures food safety and consistent results while building confidence in outdoor cooking techniques.

How much should I budget for a complete BBQ setup?
A quality basic setup ranges from $500-1500, while premium configurations can exceed $5000. Prioritize a good grill and thermometer, then add other items gradually.

Can I create an effective BBQ setup in a small space?
Absolutely. Portable grills, compact prep stations, and multi-functional accessories maximize functionality in limited spaces without sacrificing cooking quality.

What safety considerations are essential for outdoor cooking?
Maintain proper distances from structures, ensure adequate ventilation, keep fire extinguishers accessible, and never leave grills unattended during operation.

How do I maintain my BBQ equipment for longevity?
Regular cleaning, proper storage, and seasonal maintenance prevent corrosion and extend equipment life. Cover grills when not in use and clean thoroughly after each session.
July 9, 2025
0 FacebookTwitterPinterestLinkedinTumblrWhatsappTelegramEmail
Home OrganizationSummer

10 Chic Outdoor Patio Decor Ideas for Summer Gatherings

by Emma Sinclair June 27, 2025
written by Emma Sinclair

Summer is calling, and your patio should be ready to answer. Whether you’re working with a sprawling backyard deck or a cozy front patio, the right patio decor ideas can transform any outdoor space into a stunning entertainment hub that rivals the most stylish indoor rooms.

The 2025 outdoor design landscape has shifted dramatically toward sustainability, comfort, and functionality. Gone are the days of sterile matching furniture sets and cold color palettes. Today’s most coveted patio decor ideas embrace warmth, personality, and environmental consciousness while creating spaces that seamlessly extend your indoor living experience.

From small patio decor ideas that maximize every square foot to luxurious front patio decor ideas that create impressive curb appeal, this comprehensive guide will walk you through the most current trends and actionable strategies to elevate your outdoor entertaining game this summer.

1. Embrace Sustainable, Eco-Friendly Materials

Why Sustainability Matters in 2025 Patio Design

Environmental consciousness isn’t just a trend—it’s become a cornerstone of modern outdoor design. Homeowners are increasingly seeking patio furniture decor ideas that minimize environmental impact while maximizing style and durability.

Key Sustainable Materials to Consider:

  • Recycled Woods: Reclaimed teak and cedar offer rich patinas with environmental benefits
  • Bamboo Furniture: Fast-growing bamboo provides strength comparable to hardwood
  • Composite Decking: Made from recycled plastics and wood fibers, offering longevity without maintenance
  • Reclaimed Stone: Salvaged limestone, slate, and brick create unique, eco-friendly surfaces

Actionable Implementation Tips

Start your sustainable patio transformation by replacing one major element. If you’re working with small patio decor ideas, consider swapping plastic planters for recycled wood alternatives or choosing bamboo privacy screens instead of vinyl options.

For larger spaces, invest in composite decking or reclaimed stone pavers. These materials not only reduce environmental impact but often prove more cost-effective long-term due to their durability and minimal maintenance requirements.

Pro Tip: Look for certifications like FSC (Forest Stewardship Council) when selecting wood products, ensuring your materials come from responsibly managed forests.

2. Warm, Earthy Color Palettes

Chic Outdoor Patio Decor Ideas The Great Color Shift of 2025

The cool gray dominance of previous years has given way to a warmer, more inviting palette that creates psychological comfort and visual warmth in outdoor spaces.

Trending Color Combinations:

  • Terracotta and Cream: Evokes Mediterranean warmth
  • Sage Green and Sand: Brings natural, calming energy
  • Muted Blue and Warm White: Offers coastal sophistication
  • Olive and Natural Wood Tones: Creates organic, grounded spaces

Styling Your Color Palette

Implement these colors through easily changeable elements first. Outdoor cushions, throws, and table linens allow you to test color combinations before committing to larger investments like furniture or umbrellas.

Consider the psychological impact of your chosen palette. Terracotta and warm oranges stimulate conversation and appetite—perfect for dining areas. Blues and greens promote relaxation, making them ideal for lounging zones.

Design Secret: Use the 60-30-10 rule for outdoor spaces: 60% neutral base colors, 30% secondary colors, and 10% bold accent colors for visual balance.

3. Mix-and-Match Furniture for a Curated Look

Breaking the Matching Set Mentality

Professional designers have long abandoned matching outdoor furniture sets in favor of curated, layered looks that feel collected over time rather than purchased in a single shopping trip.

Successful Mixing Strategies:

  • Material Contrast: Pair powder-coated metal chairs with natural wood tables
  • Texture Play: Combine smooth surfaces with woven or textured elements
  • Scale Variation: Mix different chair heights and table sizes for visual interest
  • Color Coordination: Maintain a cohesive color story while varying furniture styles

Practical Mixing Guidelines

Start with one anchor piece—typically the largest item like a dining table or sectional sofa. This piece should reflect your primary design aesthetic and color palette. Then, build around it with complementary pieces that share either color, material, or style elements.

For small patio decor ideas, consider nesting tables in different materials or stackable chairs in coordinating colors. These pieces provide functionality while maintaining the curated aesthetic even in compact spaces.

4. Create Zones with Outdoor Rugs and Planters

The Power of Defined Spaces

Even the smallest patio benefits from intentional zoning. Strategic placement of outdoor rugs and planters creates distinct areas for different activities while making spaces feel larger and more purposeful.

Effective Zoning Techniques:

  • Dining Zone: Large rug under table and chairs, with tall planters providing privacy
  • Conversation Area: Circular or square rug defining seating arrangement
  • Transition Zones: Runner rugs connecting different areas
  • Entry Definition: Welcome mat and flanking planters at patio entrance

Choosing the Right Elements

Select outdoor rugs that can withstand your climate while adding visual weight to anchor furniture groupings. Geometric patterns work well in contemporary settings, while botanical or traditional patterns suit more classic aesthetics.

Planters serve dual purposes as design elements and functional garden containers. Use varying heights and groupings of odd numbers (3 or 5) for the most pleasing visual arrangement.

Size Guide: Your dining rug should extend at least 24 inches beyond your table on all sides to accommodate pulled-out chairs.

5. Integrate Water Features for Relaxation

Patio Tabletop fountain
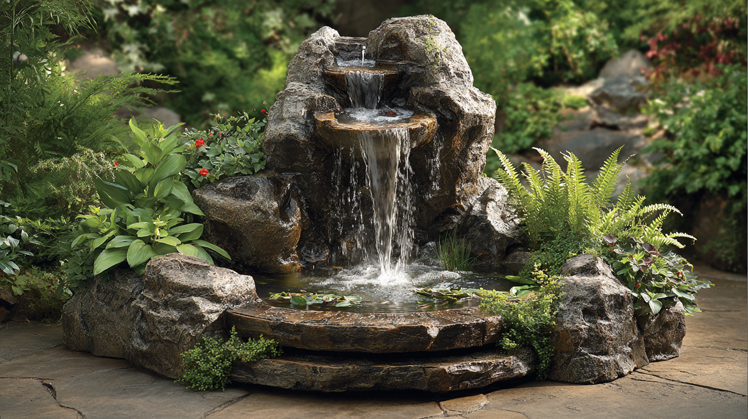
The Science of Soothing Sounds

Water features provide more than aesthetic appeal—they create natural white noise that masks urban sounds while promoting relaxation and attracting beneficial wildlife to your outdoor space.

Water Feature Options by Space Size:

Small Patios:

  • Tabletop fountains
  • Wall-mounted water features
  • Compact birdbaths

Medium Patios:

  • Freestanding fountains
  • Small pond systems
  • Tiered water features

Large Patios:

  • Custom water walls
  • Pond and waterfall combinations
  • Multiple coordinated features

Installation and Maintenance Considerations

Most small water features require only electrical access, making them perfect additions to existing patios. Solar-powered options eliminate electrical requirements entirely, though they may have limited nighttime operation.

Consider maintenance requirements when selecting features. Self-contained fountains with recirculating pumps require minimal upkeep, while pond systems need regular attention to water quality and plant health.

6. Layer Lighting for Ambiance

Creating Magic After Dark

Proper lighting extends your patio’s usability well into the evening while creating atmosphere that rivals any indoor entertainment space. The key lies in layering different types of lighting for both function and ambiance.

Essential Lighting Layers:

Task Lighting:

  • Pendant lights over dining areas
  • Under-rail LED strips for safety
  • Reading lights near seating areas

Ambient Lighting:

  • String lights for overhead warmth
  • Lanterns for tabletop glow
  • Uplighting for architectural features

Accent Lighting:

  • Spotlight features like water elements or art
  • Pathway lighting for navigation
  • Plant lighting for garden drama

Energy-Efficient Options

Solar-powered fixtures have improved dramatically in recent years, offering reliable illumination without electrical complications. LED technology provides bright, long-lasting light with minimal energy consumption.

Smart lighting systems allow remote control and programming, letting you create different lighting scenes for various occasions—bright for outdoor dining, dim for romantic evenings, or colorful for entertaining.

7. Add a Fire Feature for Warmth and Style

Tabletop Firepit
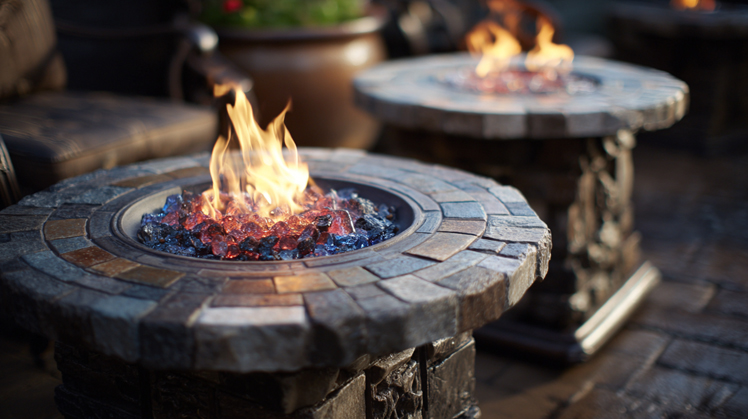
Extending the Season

Fire features serve as natural gathering points while extending your patio’s usability into cooler months. Modern fire elements offer style and functionality that complement contemporary outdoor design.

Fire Feature Types:

Portable Options:

  • Fire bowls for flexibility
  • Tabletop fire pits for intimate settings
  • Rolling fire carts for versatility

Built-in Solutions:

  • Custom fire pits with seating walls
  • Fire tables combining heating and surface space
  • Fireplace elements for dramatic focal points

Safety and Practical Considerations

Always check local fire regulations before installing any fire feature. Many municipalities have specific requirements for permanent installations and seasonal burning restrictions.

Consider fuel types carefully. Natural gas provides convenience and consistent flame, while wood offers authentic ambiance but requires more maintenance. Propane strikes a middle ground with portability and reliability.

Safety Tip: Maintain at least 10 feet of clearance from structures and always have fire safety equipment nearby.

8. Use Multifunctional and Modular Furniture

Maximizing Space Efficiency

Modern patio furniture decor ideas prioritize versatility, especially important for small patio decor ideas where every piece must work harder. Multifunctional furniture provides flexibility while maintaining style.

Smart Furniture Solutions:

Storage Integration:

  • Ottoman benches with hidden storage
  • Coffee tables with built-in coolers
  • Planters doubling as seating

Convertible Pieces:

  • Dining tables that adjust to coffee table height
  • Sectionals that reconfigure for different group sizes
  • Nesting furniture that expands when needed

Modular Systems:

  • Individual pieces that combine in multiple configurations
  • Expandable dining sets for variable guest counts
  • Stackable seating that stores compactly

Investment Strategy

Start with key modular pieces that can grow with your needs. A quality sectional system might begin with a corner piece and chairs, with additional modules added over time as budget and space allow.

Consider seasonal storage when selecting multifunctional pieces. Furniture that breaks down easily or includes weather-resistant storage helps protect your investment during harsh weather.

9. Incorporate Greenery and Vertical Gardens

Bringing Life to Your Space

Plants provide natural beauty while improving air quality and creating privacy. Strategic plant placement can transform even the most urban patio into a green oasis.

Vertical Growing Solutions:

Wall Systems:

  • Modular living walls
  • Pocket planters for herbs
  • Trellis systems for climbing plants

Hanging Options:

  • Suspended planters at varying heights
  • Macrame plant hangers for bohemian style
  • Ceiling-mounted garden systems

Container Gardens:

  • Grouped planters of varying sizes
  • Raised bed systems
  • Rolling plant carts for sun-following

Plant Selection Strategy

Choose plants appropriate for your climate and light conditions. Native species typically require less water and maintenance while supporting local ecosystems.

For small patio decor ideas, focus on plants that provide multiple benefits—herbs offer fragrance and culinary use, while flowering plants attract beneficial pollinators.

Maintenance Tip: Self-watering planters and drip irrigation systems reduce maintenance while ensuring consistent plant health.

10. Enhance Comfort with Shade Solutions

Pergolas_with_retractable_canopies
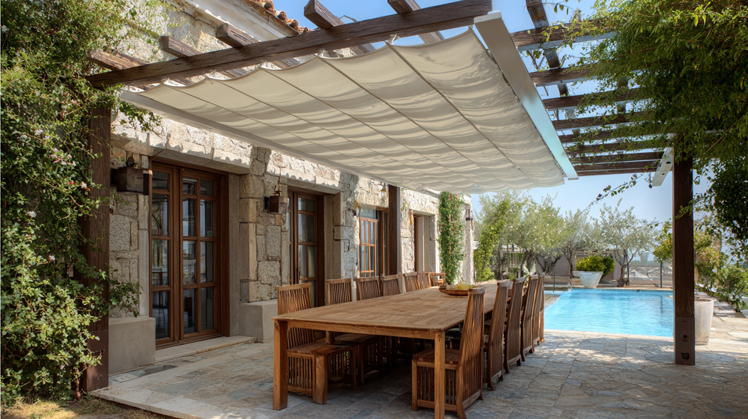
Creating Cool Retreats

Effective shade solutions make patios comfortable during peak sun hours while adding architectural interest and defining spaces.

Shade Options by Style and Function:

Permanent Solutions:

  • Pergolas with retractable canopies
  • Fixed awnings with weather resistance
  • Shade sails for modern aesthetics

Flexible Options:

  • Market umbrellas with tilting capabilities
  • Cantilever umbrellas for unobstructed space
  • Outdoor curtains for privacy and shade

Natural Shade:

  • Fast-growing trees in large planters
  • Bamboo screens for quick privacy
  • Climbing vines on trellises

Sizing and Placement

Calculate shade coverage needs based on your patio’s peak sun exposure times. West-facing patios need afternoon shade, while east-facing spaces benefit from morning protection.

Consider wind patterns when selecting shade solutions. Solid covers may catch wind like sails, while perforated or slatted options allow air flow while providing cooling.

Bonus: Smart Tech and Wellness Features

The Future of Outdoor Living

Technology integration and wellness elements represent the cutting edge of patio design, creating spaces that support both entertainment and personal well-being.

Smart Technology Integration:

  • Weather-resistant Bluetooth speakers for ambient sound
  • Smart irrigation systems for plant care
  • Automated lighting controls
  • Outdoor Wi-Fi extension for connectivity

Wellness Elements:

  • Meditation corners with comfortable seating
  • Outdoor exercise spaces with storage
  • Air-purifying plants for better breathing
  • Temperature control through misting systems

Frequently Asked Questions

What are the most budget-friendly patio decor ideas?

Start with textiles—outdoor rugs, cushions, and throws provide immediate impact at low cost. Add string lights for ambiance and group inexpensive planters for greenery. Paint existing furniture in trending colors for an instant refresh.

How do I decorate a small patio without making it feel cramped?

Use vertical space with wall planters and hanging elements. Choose multifunctional furniture and keep color palettes light and cohesive. Mirrors can create the illusion of more space, while proper lighting prevents the area from feeling closed in.

What patio decor works best for entertaining?

Focus on flexible seating arrangements, adequate lighting for evening gatherings, and convenient surfaces for food and drinks. Fire features create natural gathering points, while sound systems provide entertainment backdrop.

How do I protect my patio decor from weather?

Invest in weather-resistant materials and covers for furniture during harsh conditions. Choose fade-resistant fabrics and rust-proof metals. Create storage solutions for cushions and decorative elements during off-seasons.

What’s the best way to add privacy to my patio?

Combine physical barriers like screens or pergolas with natural elements like tall planters and climbing plants. Outdoor curtains provide adjustable privacy, while water features mask noise from neighbors.

Creating Your Perfect Summer Gathering Space

Your patio represents more than just an outdoor area—it’s an extension of your home’s personality and a stage for creating memories with family and friends. The patio decor ideas outlined here provide a roadmap for transforming any outdoor space, regardless of size or budget, into a stylish sanctuary that reflects current trends while serving your specific needs.

Remember that the best outdoor spaces evolve over time. Start with one or two elements that excite you most, whether that’s introducing sustainable materials, creating defined zones, or adding ambient lighting. Build your outdoor oasis gradually, allowing each addition to inform the next decision.

The investment you make in thoughtful patio design pays dividends in increased home value, expanded living space, and countless hours of outdoor enjoyment. This summer, step outside and experience the transformation that well-planned patio decor can bring to your daily life and special gatherings.

Ready to begin your patio transformation? Start by assessing your current space and identifying which of these trends resonates most with your vision. Your perfect outdoor entertainment space awaits.

Liked this article? Checkout: This one.

June 27, 2025
0 FacebookTwitterPinterestLinkedinTumblrWhatsappTelegramEmail
Grilled Veggies on a Platter
FoodSummer

10 Easy Grilling Ideas to Try This Summer: Quick, Budget-Friendly Recipes for Perfect Cookouts

by Emma Sinclair June 25, 2025
written by Emma Sinclair

Transform Your Summer with These Easy Grilling Ideas

Summer grilling doesn’t have to be complicated or expensive to be absolutely delicious. Whether you’re a beginner looking for foolproof recipes or an experienced griller seeking fresh inspiration, these easy grilling ideas will transform your backyard into the ultimate summer destination.

The grilling industry is booming, with the global barbecue market growing from $16.08 billion in 2024 to a projected $17.59 billion in 2025—a remarkable 9.4% growth rate. This surge reflects our collective love for outdoor cooking and the endless possibilities that come with firing up the grill.

From quick and easy grilling ideas that take minutes to prepare to cheap and easy grilling ideas that won’t break the bank, this comprehensive guide covers everything you need to host memorable cookouts all summer long. Let’s dive into these crowd-pleasing recipes that prove great grilling is all about simplicity and flavor.


1. Colorful Skewers and Kebabs: The Ultimate Crowd-Pleasers

Why Skewers Are Perfect for Easy Grilling

Skewers and kebabs top our list of fast easy grilling ideas because they’re virtually foolproof and endlessly customizable. These portable, bite-sized meals cook quickly and evenly, making them perfect for feeding hungry crowds without stress.

Classic Chicken and Veggie Skewers ($10-$15)

Ingredients (Serves 4):

  • 1 lb chicken thighs, cut into chunks
  • 2 bell peppers, chunked
  • 1 large red onion, chunked
  • 2 zucchini, sliced thick
  • 3 tbsp olive oil
  • 1 tsp garlic powder
  • Salt and pepper to taste
  • 8 wooden skewers, soaked

Instructions:

  1. Soak wooden skewers in water for 30 minutes
  2. Cut all ingredients into 1-inch pieces for even cooking
  3. Thread alternating chicken and vegetables onto skewers
  4. Brush with olive oil and season generally with garlic powder, salt, and pepper
  5. Grill over medium-high heat for 10-12 minutes, turning every 3-4 minutes
  6. Chicken should reach 165°F internal temperature

Money-Saving Tip: Chicken thighs cost 40% less than breasts and stay juicier on the grill!

Pro Tips for Perfect Skewers

The secret to exceptional skewers lies in the marinade. Always marinate proteins for at least 30 minutes—this simple step transforms ordinary ingredients into restaurant-quality meals. For even cooking, cut all ingredients into similar-sized pieces and avoid overcrowding the skewers.

Alt text suggestion: “Colorful chicken and vegetable skewers on a hot grill with char marks”


2. Grilled Chicken Salads: Light and Satisfying Summer Meals

Making Chicken Salads Restaurant-Quality

Grilled chicken salads represent the perfect marriage of healthy eating and bold flavors. The key is achieving perfectly juicy chicken with a beautiful char that adds smoky depth to any salad.

Temperature Is Everything

Use a digital meat thermometer to ensure chicken reaches 165°F internal temperature. This prevents both undercooking and the all-too-common mistake of overcooking, which results in dry, tough meat.

Mediterranean Grilled Chicken Salad ($8-$12)

Ingredients (Serves 4):

  • 4 chicken breasts, pounded thin
  • 1 bag mixed greens
  • 1 cucumber, diced
  • 1 cup cherry tomatoes
  • 1/2 cup feta cheese
  • 1/4 cup olive oil
  • 2 tbsp lemon juice
  • 1 tsp dried oregano
  • Salt and pepper

Instructions:

  1. Marinate chicken in 2 tbsp olive oil, lemon juice, oregano, salt, and pepper for 30 minutes
  2. Grill chicken 6-7 minutes per side until internal temperature reaches 165°F
  3. Let rest 5 minutes, then slice thinly
  4. Combine greens, cucumber, tomatoes, and feta
  5. Top with sliced chicken and drizzle with remaining olive oil

Budget Hack: Buy whole chickens and cut them yourself to save 30-40% on chicken costs!

Adding Grilled Elements

Don’t stop at just the chicken—grill additional components like corn, peaches, or watermelon to add extra smoky sweetness and visual appeal to your salads.


3. Vibrant Grilled Vegetable Platters: Healthy and Instagram-Worthy

Vibrant Grilled Vegetable PlatterWhy Vegetables Deserve the Spotlight

Grilled vegetables have moved from side dish to center stage, and for good reason. The high heat of grilling caramelizes natural sugars, creating complex flavors that roasting simply can’t match.

Colorful Grilled Vegetable Medley ($6-$10)

Ingredients (Serves 6):

  • 2 zucchini, sliced lengthwise
  • 2 bell peppers, quartered
  • 1 eggplant, sliced rounds
  • 8 oz mushrooms, whole
  • 3 tbsp olive oil
  • 2 cloves garlic, minced
  • 1 tsp Italian seasoning
  • Salt and pepper

Instructions:

  1. Preheat grill to medium-high heat
  2. Mix olive oil, garlic, Italian seasoning, salt, and pepper in a large bowl
  3. Toss all vegetables in oil mixture until well coated
  4. Grill vegetables in batches: zucchini and eggplant 4-5 minutes per side, peppers 6-8 minutes per side, mushrooms 5-6 minutes per side
  5. Arrange on platter and serve immediately

Money-Saving Tip: Buy vegetables in season and on sale—frozen vegetables also grill beautifully and cost 50% less!

Preparation Secrets

Lightly oil all vegetables before grilling to prevent sticking and promote even browning. Cut vegetables into uniform sizes for consistent cooking, and don’t overcrowd the grill—give each piece space to develop those coveted char marks.

Flavor-Boosting Finishing Touches

  • Feta Vinaigrette: Crumbled feta with lemon juice, olive oil, and herbs
  • Chimichurri: Fresh parsley, cilantro, garlic, and red wine vinegar
  • Balsamic Glaze: Reduces beautifully and adds elegant sweetness

Alt text suggestion: “Colorful array of charred vegetables on a white platter with chimichurri sauce”


4. Grilled Pizzas and Flatbreads: Gourmet Made Simple

The Art of Grilled Pizza

Grilled pizza might sound intimidating, but it’s actually one of the most forgiving and impressive easy grilling ideas you can master. The direct heat creates a crispy, smoky crust that no indoor oven can replicate.

Starting with the Right Foundation

Use store-bought pizza dough or naan bread for convenience. Let dough come to room temperature for easier handling, and always oil your grill grates well to prevent sticking.

Easy Grilled Margherita Flatbread ($5-$8)

Ingredients (Serves 4):

  • 2 naan breads or flatbreads
  • 1/2 cup pizza sauce
  • 8 oz fresh mozzarella, sliced
  • 1 large tomato, sliced thin
  • Fresh basil leaves
  • 2 tbsp olive oil
  • Salt and pepper

Instructions:

  1. Preheat grill to medium heat
  2. Brush one side of each flatbread lightly with olive oil
  3. Grill oil-side down for 2-3 minutes until lightly charred
  4. Flip and quickly add sauce, mozzarella, and tomato slices to grilled side
  5. Close grill lid and cook 3-4 minutes until cheese melts
  6. Remove from grill, top with fresh basil, and drizzle with remaining olive oil

Budget Hack: Use store-brand naan or pita bread instead of expensive pizza dough—costs 60% less and works perfectly!

Grilling Technique

Grill the dough first on one side until it firms up, then flip and add toppings to the cooked side. This prevents soggy bottoms and ensures even cooking.


5. Spectacular Seafood on the Grill

Why Seafood Shines on the Grill

Seafood cooks quickly and pairs beautifully with the smoky flavors that grilling provides. The key is choosing the right fish and using proper techniques to prevent sticking and overcooking.

Simple Garlic Butter Shrimp Skewers ($7-$12)

Ingredients (Serves 4):

  • 1 lb large shrimp, peeled and deveined
  • 4 tbsp butter, melted
  • 3 cloves garlic, minced
  • 1 tsp paprika
  • 1/2 tsp red pepper flakes
  • 2 tbsp fresh parsley, chopped
  • 1 lemon, cut into wedges
  • Salt and pepper
  • 8 metal skewers

Instructions:

  1. Thread 4-5 shrimp onto each skewer
  2. Mix melted butter, garlic, paprika, red pepper flakes, salt, and pepper
  3. Brush shrimp with half the butter mixture
  4. Grill over medium-high heat for 2-3 minutes per side until pink and slightly charred
  5. Brush with remaining butter mixture and sprinkle with parsley
  6. Serve immediately with lemon wedges

Money-Saving Tip: Buy frozen shrimp in bulk when on sale—they’re often fresher than “fresh” shrimp and cost 40% less!

Marinades That Make a Difference

  • Citrus Herb: Lemon juice, olive oil, garlic, and fresh dill
  • Asian-Inspired: Soy sauce, ginger, garlic, and sesame oil
  • Mediterranean: Olive oil, oregano, lemon zest, and capers

Alt text suggestion: “Perfectly grilled salmon fillet with lemon slices and fresh herbs on cedar plank”


6. Elevated Burgers and Hot Dog Bars

Fresh Hamburgers with frie
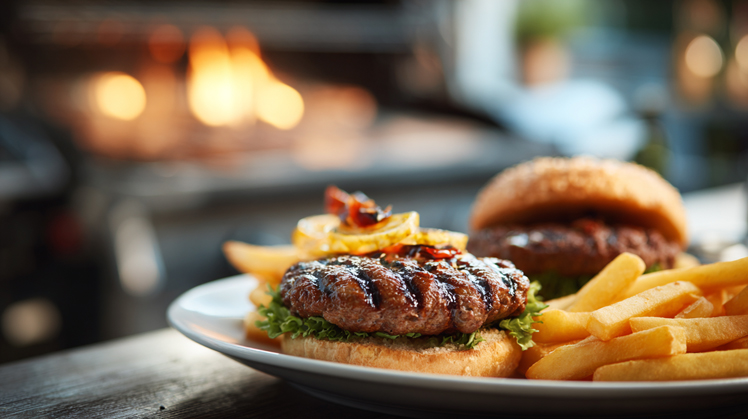
Reinventing the Classics

While burgers and hot dogs are grilling staples, a few simple upgrades can transform these familiar favorites into gourmet experiences that will have your guests talking all summer.

Classic Budget Burger Recipe ($10-$15)

Ingredients (Serves 6):

  • 1.5 lbs ground beef (80/20 blend)
  • 6 hamburger buns
  • 1 large onion, sliced
  • 6 slices cheese
  • Lettuce, tomato, pickles
  • 1 tsp garlic powder
  • 1 tsp onion powder
  • Salt and pepper

Instructions:

  1. Mix ground beef with garlic powder, onion powder, salt, and pepper
  2. Form into 6 patties, making a small indentation in the center of each
  3. Grill patties over medium-high heat for 4-5 minutes per side for medium doneness
  4. Never press down with spatula! This squeezes out juices
  5. Add cheese in the last minute of cooking
  6. Toast buns on grill for 30 seconds
  7. Assemble with desired toppings

Budget Hack: Buy ground beef in family packs when on sale and freeze portions—saves up to $2 per pound!

Global Topping Bar Ideas

Korean-Inspired Station:

  • Kimchi
  • Sriracha mayo
  • Pickled cucumber
  • Sesame seeds

Mediterranean Corner:

  • Tzatziki sauce
  • Grilled red peppers
  • Feta cheese
  • Fresh herbs

Mexican Fiesta:

  • Guacamole
  • Pickled jalapeños
  • Cotija cheese
  • Lime crema

Upgrade Your Buns

Toast buns on the grill for 30-60 seconds for extra flavor and texture. This simple step prevents soggy bottoms and adds a professional touch.


7. Sweet and Savory Grilled Fruit

The Magic of Grilled Fruit

Grilling fruit caramelizes natural sugars and adds smoky depth that transforms ordinary produce into extraordinary desserts and side dishes.

Best Fruits for Grilling

Stone Fruits (Perfect for beginners):

  • Peaches, plums, and nectarines
  • Cut in half, remove pits
  • Grill cut-side down for 4-5 minutes

Tropical Options:

  • Pineapple rings
  • Mango spears
  • Banana halves (in peel)

Surprising Success:

  • Watermelon wedges (yes, really!)
  • Apple wedges with cinnamon
  • Pear halves with honey

Honey Grilled Peaches ($3-$6)

Ingredients (Serves 4):

  • 4 large peaches, halved and pitted
  • 2 tbsp honey
  • 1 tbsp butter, melted
  • 1/2 tsp cinnamon
  • Vanilla ice cream for serving

Instructions:

  1. Preheat grill to medium heat
  2. Mix honey, melted butter, and cinnamon in a small bowl
  3. Brush peach halves with honey mixture
  4. Grill cut-side down for 4-5 minutes until caramelized and slightly softened
  5. Flip and grill another 2-3 minutes
  6. Serve warm over vanilla ice cream

Budget Tip: Buy peaches when they’re in season and slightly underripe—they’ll be cheaper and perfect for grilling as they won’t fall apart!

Preparation Tips

Lightly oil fruit before grilling to enhance caramelization and prevent sticking. Don’t over-grill—fruit should be caramelized but still hold its shape.


8. Plant-Based Grilling That Satisfies Everyone

Beyond the Veggie Burger

Plant-based grilling has evolved far beyond simple veggie patties. Today’s easy grilling ideas for vegetarians and vegans are hearty, flavorful, and satisfying enough to please even dedicated carnivores.

Grilled Cauliflower Steaks with Herbs ($4-$7)

Ingredients (Serves 4):

  • 1 large head cauliflower
  • 1/4 cup olive oil
  • 2 tsp smoked paprika
  • 1 tsp garlic powder
  • 1/4 cup fresh parsley, chopped
  • 1 lemon, juiced
  • Salt and pepper

Instructions:

  1. Remove leaves from cauliflower and trim stem, keeping core intact
  2. Cut cauliflower into 3/4-inch thick “steaks” from top to bottom
  3. Mix olive oil, paprika, garlic powder, salt, and pepper
  4. Brush both sides of cauliflower steaks with oil mixture
  5. Grill over medium heat for 6-8 minutes per side until tender and charred
  6. Sprinkle with fresh parsley and lemon juice before serving

Money-Saving Tip: Cauliflower is cheapest in fall and winter—buy extra and freeze florets for smoothies and other dishes!

Marinade Magic for Vegetables

Teriyaki Glaze:

  • Soy sauce, brown sugar, garlic, and ginger
  • Perfect for eggplant and zucchini

Chimichurri Marinade:

  • Fresh herbs, garlic, vinegar, and olive oil
  • Excellent for bell peppers and mushrooms

Mediterranean Blend:

  • Olive oil, lemon juice, oregano, and garlic
  • Classic combination for any grilled vegetable

9. DIY Taco and Sandwich Nights

Creating Interactive Dining Experiences

Build-your-own taco and sandwich bars are among the most popular quick and easy grilling ideas because they’re interactive, customizable, and virtually guarantee something for everyone.

Protein Preparation Made Simple

Indirect Heat Cooking: For thicker cuts like chicken thighs or pork tenderloin, use indirect heat. This means placing the meat away from direct flames, allowing it to cook evenly without burning.

Quick-Cooking Options:

  • Fish fillets (3-4 minutes per side)
  • Chicken strips (5-6 minutes total)
  • Beef strips for fajitas (2-3 minutes per side)

Build-Your-Own Chicken Taco Bar ($12-$18)

Ingredients (Serves 6):

  • 2 lbs chicken thighs, boneless
  • 12 small flour tortillas
  • 1 packet taco seasoning
  • 2 limes, juiced
  • 1 head lettuce, shredded
  • 2 tomatoes, diced
  • 1 cup shredded cheese
  • Sour cream

Instructions:

  1. Marinate chicken thighs in lime juice and taco seasoning for 30 minutes
  2. Grill over medium-high heat for 6-7 minutes per side until internal temperature reaches 165°F
  3. Let rest 5 minutes, then slice into strips
  4. Warm tortillas on grill for 30 seconds per side
  5. Set up taco bar with chicken, tortillas, and all toppings
  6. Let everyone build their own tacos

Budget Hack: Chicken thighs cost half the price of breasts and have more flavor—perfect for tacos!

Pro Tips for Success

Keep grilled proteins warm in foil packets on a cooler part of the grill. Set up toppings in small bowls with serving spoons, and don’t forget napkins and wet wipes for easy cleanup.


10. Memorable Grilled Sides and Snacks

Easy grilling ideas Mexican grilled corn
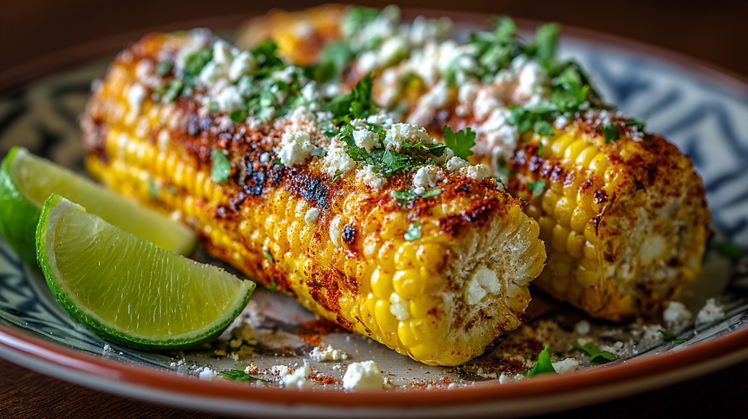
Completing the Perfect Meal

Great sides can elevate a simple grilled protein into a memorable feast. These easy grilling ideas for sides are designed to complement your main dishes while adding variety and visual appeal.

Mexican Street Corn (Elote) ($4-$7)

Ingredients (Serves 4):

  • 4 ears corn, husked
  • 1/4 cup mayonnaise
  • 1/4 cup cotija cheese, crumbled
  • 1 tsp chili powder
  • 1 lime, cut into wedges
  • 4 wooden sticks

Instructions:

  1. Insert wooden sticks into core of each corn cob
  2. Grill corn over medium-high heat for 10-12 minutes, turning every 3 minutes until charred all over
  3. Brush hot corn with mayonnaise
  4. Roll in or sprinkle with cotija cheese
  5. Dust with chili powder
  6. Serve immediately with lime wedges

Budget Tip: Make your own chili-lime seasoning by mixing chili powder with lime zest—costs pennies compared to store-bought versions!

Foil Packet Perfection

Garlic Herb Potatoes:

  • Slice potatoes thinly
  • Add butter, garlic, and herbs
  • Wrap in foil and grill for 25-30 minutes

Sweet Potato Packets:

  • Cube sweet potatoes
  • Add brown sugar, cinnamon, and butter
  • Perfect fall-inspired side dish

Bread That Steals the Show

Garlic Baguette:

  • Slice baguette, brush with garlic butter
  • Grill cut-side down until crispy
  • Sprinkle with fresh parsley

Expert Tips for Grilling Success

Essential Tools for Easy Grilling

Must-Have Equipment:

  • Long-handled stainless steel tongs
  • Wide spatula for delicate items
  • Grill brush for cleaning grates
  • Digital instant-read thermometer
  • Grill baskets for small items

Mastering Heat Zones

Create different temperature zones on your grill by arranging coals to one side (for charcoal) or using only some burners (for gas). This gives you options for searing over high heat and finishing over gentler heat.

Food Safety Fundamentals

  • Keep raw and cooked foods separate
  • Clean grill grates before and after cooking
  • Use separate utensils for raw and cooked meats
  • Let meat rest 5-10 minutes after grilling to retain juices

Creating the Perfect Atmosphere

Ambiance Matters:

  • String lights for evening grilling
  • Comfortable seating arrangements
  • Background music that encourages conversation
  • Citronella candles to keep bugs away

Current Grilling Trends for 2025

Technology Meets Tradition

The grilling world is embracing both high-tech innovations and traditional methods. Smart grills with app connectivity are growing in popularity, while charcoal grilling is experiencing a renaissance among flavor purists.

Health-Conscious Choices

More people are grilling vegetables and plant-based proteins than ever before. This shift reflects growing awareness of health benefits and environmental concerns, making vegetarian grilling options essential for modern cookouts.

Global Flavor Exploration

International flavors are dominating backyard grilling, with Korean, Middle Eastern, and Latin American influences appearing in marinades, rubs, and side dishes.


Frequently Asked Questions

What are the easiest things to grill for beginners?

Start with foods that cook quickly and are hard to overcook: shrimp, chicken strips, vegetables like bell peppers and zucchini, and pre-made items like sausages. These options build confidence while teaching basic grilling techniques.

How do I prevent food from sticking to the grill?

Clean your grill grates thoroughly, preheat the grill properly, and oil the grates just before cooking. Also, avoid flipping food too early—let it develop a crust before turning.

What’s the best way to know when meat is done?

Use a digital instant-read thermometer for accuracy. Chicken should reach 165°F, pork 145°F, and beef varies by preference (125°F for rare, 135°F for medium-rare, 145°F for medium).

How can I add flavor without expensive marinades?

Simple seasoning combinations work wonderfully: salt, pepper, and garlic powder for basics; paprika, cumin, and chili powder for smoky heat; or Italian herbs with lemon zest for Mediterranean flair.

What vegetables grill best for beginners?

Bell peppers, zucchini, corn, mushrooms, and asparagus are foolproof choices. They’re sturdy enough to handle easily, cook relatively quickly, and taste great with just olive oil and seasoning.

How long should I marinate meats?

Thin cuts like chicken strips need only 30 minutes, while thicker cuts benefit from 2-4 hours. Avoid marinating too long in acidic marinades, as they can make meat mushy.


Your Summer of Delicious Grilling Awaits

These 10 easy grilling ideas prove that exceptional outdoor cooking doesn’t require complicated techniques or expensive ingredients. From quick weeknight dinners to impressive weekend gatherings, these recipes and tips will help you create memorable meals that bring people together.

The beauty of grilling lies in its simplicity and the joy of cooking outdoors. Whether you’re mastering the perfect burger, exploring plant-based options, or creating Instagram-worthy vegetable platters, the key is to start simple and build confidence with each cookout.

Ready to fire up your grill? Start with one or two recipes that appeal to you most, gather your friends and family, and create those perfect summer memories. Don’t forget to share your grilling successes—tag us in your photos and inspire others to discover the joy of easy, delicious outdoor cooking.

What will you grill first this summer?

Liked this article? Be sure to checkout: 10 Cool Summer Door Wreaths to Welcome Guests in Style

June 25, 2025
0 FacebookTwitterPinterestLinkedinTumblrWhatsappTelegramEmail
Summer

10 Cool Summer Door Wreaths to Welcome Guests in Style

by Emma Sinclair June 23, 2025
written by Emma Sinclair

Transform Your Entryway with These Show-Stopping Summer Door Wreaths

Summer is the perfect time to refresh your home’s first impression. Nothing welcomes guests quite like a beautifully crafted summer door wreath that captures the season’s vibrant energy and your personal style. Whether you’re hosting backyard barbecues, pool parties, or simply want to brighten your everyday entrance, the right wreath can transform your front door into a stunning focal point.

Summer door wreaths have evolved far beyond simple floral arrangements. Today’s trending designs embrace bold colors, sustainable materials, and creative themes that reflect both seasonal beauty and individual personality. From coastal-inspired creations to farmhouse charm, there’s a perfect summer front door wreath waiting to enhance your home’s curb appeal.

Why Summer Door Wreaths Are Essential for Your Home

Summer wreaths serve multiple purposes beyond mere decoration. They create an instant mood booster for both residents and visitors, establishing a warm, welcoming atmosphere before guests even step inside. A well-chosen wreath can significantly enhance your home’s curb appeal, potentially increasing property value while showcasing your attention to detail and design sensibility.

The 2025 wreath trends emphasize sustainability, personalization, and bold seasonal elements that capture summer’s essence. These designs reflect broader home decor movements toward eco-conscious choices and custom, handmade aesthetics that stand out in a world of mass-produced decorations.

1. Classic Floral Summer Door Wreaths

Classic summer floral door wreath with sunflowers and eucalyptusTimeless Beauty That Never Goes Out of Style

Classic floral wreaths remain the gold standard for summer front door wreaths, offering endless possibilities for color combinations and seasonal blooms. Sunflowers, peonies, hydrangeas, and roses create lush, vibrant displays that embody summer’s natural beauty.

Key Design Elements:

  • Mix fresh dried flowers with high-quality faux blooms for longevity
  • Incorporate complementary greenery like eucalyptus or ivy for depth
  • Try asymmetrical arrangements or heart-shaped designs for modern appeal
  • Layer different flower sizes for visual interest and dimension

Pro Tip: Start with a neutral base of greenery, then add your statement flowers in odd numbers (groups of 3 or 5) for the most visually appealing arrangement.

2. Sophisticated Greenery-Only Wreaths

Elegant Minimalism Meets Natural Beauty

Greenery-only wreaths have surged in popularity for their sophisticated, spa-like aesthetic. These summertime door wreaths work especially well for contemporary homes or those seeking a more subtle seasonal statement.

Popular Greenery Options:

  • Eucalyptus for silvery-green elegance
  • Boxwood for classic, manicured appearance
  • Ferns for textural interest and cottage charm
  • Mixed herbs like rosemary and lavender for subtle fragrance

Styling Innovation: Consider asymmetrical hoop designs where greenery covers only one side or creates a cascading effect. Add small citrus elements or dried wheat stalks for unexpected summer pops.

3. Coastal and Beach-Themed Wreaths

Bring Ocean Breezes to Your Front Door

Coastal wreaths capture summer’s relaxed, vacation-like atmosphere through carefully curated beach elements. These designs work beautifully for waterfront properties or anyone wanting to evoke seaside serenity.

Essential Coastal Elements:

  • Natural or faux seashells in varying sizes
  • Starfish and sand dollars for authentic beach feel
  • Driftwood pieces for rustic texture
  • Soft blue, white, and sandy beige color palette
  • Nautical rope or jute for natural binding

Design Strategy: Use a grapevine base wrapped with rope, then layer shells and coastal elements asymmetrically. Add flowing ribbons in ocean blues or crisp whites to simulate sea breezes.

4. Vibrant Citrus and Fruit-Inspired Wreaths

Vibrant Citrus Door WreathFresh, Energizing Designs for Summer 2025

Citrus wreaths perfectly capture summer’s refreshing energy while adding bold, cheerful color to any entrance. These spring summer door wreaths work particularly well in warm climates or Mediterranean-style homes.

Fruit Selection Tips:

  • Faux lemons and limes for bright, long-lasting color
  • Dried orange slices for natural fragrance and rustic appeal
  • Small artificial pineapples for tropical flair
  • Mixed berry clusters for texture variation

Mediterranean Touch: Pair citrus elements with olive branches, magnolia leaves, or bay laurel for sophisticated European-inspired designs. Add terra cotta accents or burlap ribbons to complete the look.

5. Cozy Farmhouse Style Wreaths

Rustic Charm Meets Summer Comfort

Farmhouse wreaths embrace neutral palettes and natural textures, creating welcoming displays that feel both timeless and on-trend. These designs work beautifully with traditional and transitional home styles.

Signature Farmhouse Elements:

  • Cotton stems and bolls for authentic agricultural feel
  • Burlap or gingham ribbons in muted tones
  • Wooden monograms or small chalkboard signs
  • Neutral flowers like white hydrangeas or cream roses
  • Reclaimed wood accents or galvanized metal details

Personalization Ideas: Add a small wooden sign with your family name or a favorite summer quote. Consider seasonal swaps—replace some elements monthly to keep the wreath fresh throughout summer.

6. Modern Succulent and Dried Flower Wreaths

Low-Maintenance Beauty for Busy Homeowners

Succulent wreaths represent one of 2025’s hottest trends, combining modern aesthetics with practical benefits. These designs require minimal maintenance while delivering maximum visual impact.

Design Components:

  • Faux or preserved succulents in varying shapes and sizes
  • Dried grasses and wheat for textural contrast
  • Moss base for natural, organic appearance
  • Seed pods and natural elements for dimension
  • Muted color palette focusing on greens, grays, and earth tones

Longevity Tips: Position succulent wreaths in covered or shaded areas to preserve colors and prevent UV damage. These wreaths can last entire seasons with minimal care.

7. Bold Mesh and Ribbon Wreaths

Bold Mesh and Ribbon WreathsFestive, Eye-Catching Designs

Deco mesh wreaths bring festival-like energy to summer front door displays. These designs work particularly well for families with children or those who love bold, playful aesthetics.

Color Combinations That Pop:

  • Bright yellow with coral for sunset vibes
  • Turquoise with lime green for tropical energy
  • Hot pink with orange for maximum impact
  • Classic red, white, and blue for patriotic themes

Layering Technique: Start with a wire frame, then layer mesh in alternating colors. Add ribbon tails and statement elements like large flowers, flip-flops, or seasonal ornaments for personality.

8. Patriotic and Holiday-Themed Wreaths

Celebrate Summer Holidays in Style

Patriotic wreaths serve double duty, honoring summer holidays while maintaining broad seasonal appeal. These designs can easily transition from Memorial Day through Labor Day with simple accent changes.

Versatile Design Elements:

  • Red, white, and blue paper flowers for weather resistance
  • Bandana fabric twisted into rosettes
  • Small American flags or stars
  • White daisies with red and blue accents
  • Natural straw or burlap base for rustic patriotic appeal

Seasonal Adaptability: Create a base wreath with neutral elements, then add removable patriotic accents that can be swapped for other summer themes throughout the season.

9. Eco-Friendly and Sustainable Wreaths

Eco friendly Wreaths for your homeBeautiful Designs That Protect the Planet

Sustainable wreaths reflect 2025’s growing environmental consciousness while creating stunning natural displays. These designs often prove more cost-effective and can be composted at season’s end.

Sustainable Materials:

  • Locally sourced flowers and greenery
  • Grapevine or willow bases from pruned branches
  • Natural twine instead of wire for binding
  • Foraged elements like pinecones, acorns, or interesting branches
  • Seed pods and berries for natural decoration

Eco-Friendly Assembly: Use natural adhesives where possible, and design wreaths for easy disassembly and composting. Consider creating wreaths that can be refreshed with new natural elements rather than completely replaced.

10. Whimsical and Themed Wreaths

Let Your Personality Shine

Themed wreaths offer unlimited creative possibilities, allowing homeowners to express personality and interests through front door displays. These designs work especially well for casual, family-friendly homes.

Popular Theme Ideas:

  • Watermelon slices with black seeds and green rind
  • Flamingo paradise with pink feathers and tropical elements
  • Flip-flop summer with colorful sandals and beach balls
  • Garden party themes with miniature watering cans and garden tools
  • Ice cream and popsicle designs for family fun

DIY Approach: Use painted wood pieces, fabric scraps, and craft store elements to create unique themed wreaths that reflect your family’s summer activities and interests.

Expert Tips for Wreath Success

Sophisticated Greenery WreathChoosing the Perfect Base

Your wreath base determines both appearance and durability. Wire frames work best for heavy elements, while foam bases suit lightweight materials. Grapevine offers natural rustic appeal, and hoop frames create modern, minimalist looks.

Layering for Professional Results

Start with your largest elements (base greenery), add medium-sized focal points (flowers or main decorations), then finish with small accent pieces. This layering technique creates depth and visual interest.

Securing Elements Properly

Outdoor wreaths face weather challenges, so proper attachment is crucial. Use floral wire for natural materials, hot glue for lightweight items, and zip ties for heavier elements. Test all connections before hanging.

Maintenance and Longevity

Position wreaths away from direct sunlight to prevent fading. Mist fresh elements weekly, dust artificial materials monthly, and rotate wreaths occasionally to ensure even wear.

Styling Your Summer Door Wreath

Color Coordination Strategies

Match your wreath to existing exterior colors for cohesive appeal. Consider your door color, trim, and surrounding landscaping when selecting wreath colors. Bold contrasts create drama, while tonal variations offer sophisticated elegance.

Placement and Presentation

Traditional door hanging works for most wreaths, but consider alternative placements like garden gates, patio walls, or interior doors. Add decorative hanging ribbons or incorporate wreaths into larger entrance displays.

Seasonal Transition Planning

Design wreaths with removable elements that can be swapped for fall transitions. This approach maximizes your investment while keeping displays fresh and seasonally appropriate.

Frequently Asked Questions

How long do summer door wreaths typically last?

High-quality artificial wreaths can last 2-3 seasons with proper care, while fresh flower wreaths typically look best for 2-4 weeks. Dried flower and greenery wreaths often last the entire summer season.

What’s the best size wreath for my front door?

Standard residential doors (36 inches wide) look best with 18-24 inch wreaths. Larger doors can accommodate 30+ inch wreaths, while smaller doors or interior applications work well with 12-16 inch wreaths.

How do I protect my wreath from summer weather?

Position wreaths in covered areas when possible, use UV-resistant materials, and apply fabric protector spray to ribbon elements. Bring wreaths inside during severe weather to prevent damage.

Can I make my own summer door wreath?

Absolutely! DIY wreaths offer unlimited customization and often cost less than purchased versions. Start with a simple base and add elements gradually, securing each piece properly for outdoor durability.

What’s the difference between summer and spring door wreaths?

Summer wreaths typically feature bolder colors, heat-resistant materials, and themes like beaches, citrus, or patriotic elements. Spring wreaths often emphasize pastels, fresh growth, and Easter or Mother’s Day themes.

Welcome Summer in Style

Summer door wreaths offer the perfect opportunity to showcase your style while creating a warm, welcoming entrance for guests. Whether you prefer classic floral elegance, modern minimalism, or playful themed designs, there’s a perfect summer front door wreath waiting to transform your home’s first impression.

The key to success lies in choosing designs that reflect both your personal aesthetic and practical needs. Consider your home’s architecture, local climate, and maintenance preferences when selecting or creating your ideal wreath. Remember that the best summer door wreaths combine visual appeal with durability, creating displays that look beautiful throughout the season.

Ready to welcome guests in style? Start planning your summer door wreath project today, and transform your entrance into a stunning seasonal statement that captures the joy and energy of summer 2025.

Liked this article? You should check out: 10 Modern Easter Decor Ideas

June 23, 2025
0 FacebookTwitterPinterestLinkedinTumblrWhatsappTelegramEmail
LifestyleSeasonal

10 Modern Easter Decor Ideas

by Emma Sinclair April 11, 2025
written by Emma Sinclair

(Please note: As an Amazon Associate, I earn commission from qualifying purchases in any of the links Below)

Easter is just around the corner, and it’s time to give your home a fresh, modern twist on traditional decorations. Are you tired of the same old pastel eggs and fluffy bunnies? Looking for ways to celebrate the season with style and sophistication? Look no further with our 10 Modern Easter Decor Ideas!

Discover the world of contemporary Easter decor that combines tradition with trendsetting designs. From minimalist egg displays to tech-integrated accents, we’ve curated a list of 10 Modern Easter Decor Ideas that will transform your space into a chic spring haven. Whether you’re hosting a grand Easter brunch or simply want to refresh your home for the season, these innovative ideas will inspire you to think outside the Easter basket.

Get ready to explore a palette of pastel twists, sustainable options, and globally-inspired accents that will breathe new life into your Easter celebrations. Let’s dive into these exciting Modern Easter Decor Ideas that blend the warmth of tradition with the coolness of modern design!

Minimalist Easter Egg Displays

Minimalist Easter egg display featuring monochromatic eggs in various textures arranged in a contemporary white bowl

Monochromatic egg arrangements

Embrace simplicity with monochromatic egg displays that exude elegance and sophistication. Choose a single color palette, such as various shades of white, cream, or even muted pastels, to create a cohesive and visually striking arrangement. Place eggs of different sizes and textures in a minimalist bowl or on a sleek tray for a modern touch.

Key elements for a stunning monochromatic display:

  • Use a mix of matte and glossy finishes
  • Incorporate subtle patterns or textures
  • Vary egg sizes for visual interest

Geometric egg holders

Add a contemporary twist to your Easter decor with geometric egg holders. These modern structures provide a unique way to showcase your eggs while doubling as sculptural art pieces. Opt for materials like metal, wood, or acrylic to complement your existing decor style.

Popular geometric egg holder designs:

  1. Triangular prisms
  2. Hexagonal frames
  3. Circular wire stands
  4. Cube-shaped holders

Floating egg installations

Create an eye-catching focal point with a floating egg installation. This avant-garde approach to Easter decor brings a sense of whimsy and modernity to your space. Suspend eggs at varying heights using clear fishing line or thin ribbons, arranging them in a cascading pattern or a structured grid formation.

Now that we’ve explored minimalist Easter egg displays, let’s move on to nature-inspired Easter centerpieces that bring the outdoors in.

Monochromatic Egg Arrangements

  • Set of 12 White Ceramic Decorative Eggs
    Perfect for creating a sleek, uniform look in your displays.​

  • Matte Pastel Decorative Egg Set
    Adds subtle color variations while maintaining a minimalist aesthetic.

Nature-Inspired Easter Centerpieces

Moss and succulent nests

Create enchanting Easter centerpieces by combining the delicate beauty of moss with the unique charm of succulents. These miniature gardens offer a fresh, organic twist on traditional Easter decor. To craft your own:

  1. Choose a shallow bowl or dish
  2. Line it with a layer of moss
  3. Arrange small succulents within the moss
  4. Nestle colorful eggs or egg-shaped stones among the plants

The contrast between the lush green moss, the varied textures of succulents, and the smooth eggs creates a visually striking display.

Floral egg wreaths

Transform ordinary egg wreaths into stunning natural centerpieces. Use a mix of fresh or high-quality faux flowers to encircle a wreath form, then add pastel-colored eggs for a touch of Easter magic. Consider:

  • Incorporating local, seasonal blooms
  • Using a variety of flower sizes and shapes
  • Adding greenery for depth and texture

Place these wreaths flat on tables or suspend them above for an eye-catching focal point.

Terrarium-style egg displays

Bring the outdoors in with miniature terrariums featuring eggs as the star attraction. Use clear glass containers to showcase layers of pebbles, soil, and moss. Carefully place eggs within this natural setting, surrounded by small plants or figurines. This approach allows for endless creativity and personalization.

Branches with hanging eggs

Embrace the simplicity of nature by using branches as a base for your Easter centerpiece. Select interesting, sculptural branches and arrange them in a tall vase. Decorate the branches with:

  • Painted or dyed eggs hung from ribbons
  • Delicate paper flowers
  • Tiny bird’s nests

This vertical display adds height and drama to your Easter table, while maintaining a natural, organic feel.​

Contemporary Easter Wreath Ideas

Metal hoop wreaths

Metal hoop wreaths offer a sleek and modern twist on traditional Easter decor. These minimalist designs provide a perfect canvas for showcasing spring blooms and Easter-themed elements. Consider using:

  • Gold or copper hoops for a touch of elegance
  • Matte black finishes for a contemporary edge
  • Multiple hoops of varying sizes for a layered effect

Adorn your metal hoop wreath with:

  1. Faux or dried flowers
  2. Pastel-colored ribbons
  3. Miniature Easter eggs
  4. Delicate greenery

Asymmetrical designs

Break away from conventional circular wreaths with asymmetrical designs that add visual interest to your Easter decor. These unique arrangements can be:

  • Off-center compositions
  • Crescent-shaped displays
  • Cascading floral arrangements

Mix textures and materials to create depth and dimension in your asymmetrical wreath. Incorporate elements like:

  • Feathers
  • Twine
  • Moss
  • Wooden cutouts

Unconventional materials

Push the boundaries of wreath design by incorporating unexpected materials. This approach adds a contemporary flair to your Easter decor while showcasing your creativity. Experiment with:

  • Woven fabric strips
  • Colorful yarn or thread
  • Repurposed plastic materials
  • Natural elements like driftwood or branches

Create a focal point by adding a modern Easter motif, such as a geometric bunny silhouette or abstract egg shapes. These unconventional wreaths serve as conversation starters and unique pieces of Easter-themed art for your home.

Pastel Color Palettes with a Twist

Muted pastels for sophistication

Gone are the days of saccharine-sweet Easter decor. This year, embrace a more refined approach with muted pastels. These subdued hues offer a sophisticated twist on traditional Easter colors, creating a calm and elegant atmosphere. Consider incorporating:

  • Sage green
  • Dusty rose
  • Pale lavender
  • Soft blue-gray

These muted tones work beautifully in various decor elements, from tablecloths and napkins to decorative eggs and floral arrangements.

Ombre egg decorations

Take your Easter egg game to the next level with stunning ombre effects. This gradient technique adds depth and visual interest to your decorations. To create ombre eggs:

  1. Start with a light base color
  2. Gradually add darker shades of the same hue
  3. Blend the colors for a seamless transition

Try this technique with different pastel colors for a cohesive yet varied display. Arrange your ombre eggs in clear glass vases or on tiered cake stands for maximum impact.

Metallic accents

To truly elevate your pastel Easter decor, introduce metallic accents. These shimmering elements add a touch of luxury and create a beautiful contrast against the soft pastel backdrop. Consider incorporating:

  • Gold-rimmed plates and glassware
  • Silver or rose gold egg holders
  • Metallic ribbon for wrapping gifts or tying napkins
  • Copper wire baskets for displaying eggs or flowers

By combining muted pastels with strategic metallic touches, you’ll create a modern and sophisticated Easter aesthetic that’s sure to impress your guests.

Modern Easter Tree Concepts

Modern Scandinavian Easter tree with birch branches and minimalist wooden egg ornaments in soft pastel colors

Minimalist twig trees

Embrace the elegance of simplicity with minimalist twig trees, a fresh take on traditional Easter decor. These understated yet striking arrangements bring a touch of nature indoors while maintaining a clean, modern aesthetic. To create your own:

  • Choose slender, bare branches from trees like birch or willow
  • Arrange them in a tall, clear vase or a sleek metallic container
  • Add a few carefully selected ornaments, such as:
    • Delicate pastel-colored eggs
    • Small origami birds
    • Tiny fairy lights

LED light-up egg trees

Illuminate your Easter celebration with enchanting LED light-up egg trees. These contemporary decorations blend technology with tradition, creating a mesmerizing focal point for any room. Key features include:

  • Artificial tree structures with branches designed to hold eggs
  • LED lights integrated into translucent or hollow plastic eggs
  • Color-changing options for a dynamic display

Scandinavian-inspired designs

Channel the effortless chic of Nordic design with Scandinavian-inspired Easter trees. These designs emphasize clean lines, natural materials, and a muted color palette. Incorporate elements such as:

  • Birch or white-painted wooden tree structures
  • Felt or wooden egg ornaments in soft, earthy tones
  • Simple geometric shapes like stars or hearts as additional decorations

Now that we’ve explored modern Easter tree concepts, let’s move on to sustainable Easter decor options that complement these contemporary designs.

Sustainable Easter Decor

Eco-friendly egg alternatives

When it comes to sustainable Easter decor, eco-friendly egg alternatives are a great place to start. Consider these options:

  • Wooden eggs: Durable and reusable year after year
  • Felted wool eggs: Soft, colorful, and biodegradable
  • Paper mache eggs: Crafted from recycled materials
  • Clay eggs: Can be made at home and painted as desired

Upcycled container ideas

Give new life to everyday items by repurposing them as Easter containers:

  • Mason jars: Perfect for holding flowers or candy
  • Tin cans: Paint them pastel colors for a chic look
  • Old teacups: Ideal for small flower arrangements
  • Wooden crates: Use as rustic Easter baskets

Natural dye techniques

Embrace the beauty of nature with these eco-friendly egg dyeing methods:

  1. Onion skins for rich browns and oranges
  2. Beets for vibrant pinks and reds
  3. Turmeric for sunny yellows
  4. Spinach or parsley for various shades of green

Reusable fabric decorations

Incorporate fabric elements into your Easter decor for a sustainable and cozy touch:

  • Fabric bunnies: Sew cute, stuffed rabbits from old clothes
  • Burlap banners: Create festive messages with natural fibers
  • Fabric egg cozies: Knit or crochet cute covers for eggs
  • Quilted table runners: Repurpose fabric scraps for a unique table setting

By incorporating these sustainable Easter decor ideas, you’ll create a beautiful and environmentally friendly celebration. Next, we’ll explore how to add a modern twist to your Easter decor with typography-based decorations.

Typography-Based Easter Decorations

Modern calligraphy signs

Transform your Easter decor with elegant modern calligraphy signs. These eye-catching pieces blend traditional Easter sentiments with contemporary design, creating a sophisticated and personalized touch to your holiday decorations. Use sleek, minimalist frames or rustic wooden boards as your canvas, and experiment with different calligraphy styles to match your home’s aesthetic.

Word art eggs

Take Easter egg decorating to the next level with word art eggs. This creative approach combines the timeless tradition of egg decorating with modern typography trends. Here are some ideas to get you started:

  • Use letter stickers or stencils to spell out Easter-themed words on painted eggs
  • Write inspirational quotes or personal messages using fine-tipped markers
  • Create a word collage effect by layering different fonts and sizes on a single egg

Typographic Easter banners

Add a festive flair to your walls or mantel with typographic Easter banners. These versatile decorations can be customized to suit any style, from sleek and modern to playful and whimsical. Consider using laser-cut wooden letters, fabric appliqués, or even 3D-printed elements to create a unique banner that celebrates the spirit of Easter through words and typography.

By incorporating these typography-based Easter decorations, you’ll create a modern and personalized holiday ambiance that’s sure to impress your guests. Next, we’ll explore how geometric Easter baskets can add a contemporary twist to this classic holiday tradition.

Geometric Easter Baskets

Contemporary geometric wire Easter basket with sustainable wooden eggs featuring modern typography and global design elements

Wire frame baskets

Wire frame baskets offer a sleek and modern twist on traditional Easter baskets. These lightweight, minimalist containers provide an airy and elegant look while still serving the practical purpose of holding Easter treats. Here are some creative ideas for incorporating wire frame baskets into your Easter decor:

  • Use different geometric shapes: Choose from spheres, cubes, or pyramids for a unique look
  • Mix metallic finishes: Combine gold, silver, and rose gold wire baskets for visual interest
  • Layer with fabric: Line the baskets with pastel-colored fabric for a softer touch
  • Hang them as decorations: Suspend wire baskets from the ceiling or on walls as Easter-themed art

Origami-inspired containers

Bring a touch of Japanese art to your Easter celebration with origami-inspired baskets. These intricate, folded designs add a contemporary flair to your decor while showcasing your creativity. Consider these options:

  • Fold colorful paper into geometric shapes like hexagons or octagons
  • Create modular origami baskets using multiple sheets of paper
  • Incorporate metallic or patterned paper for added visual appeal
  • Use waterproof origami paper for outdoor Easter egg hunts

Lucite or acrylic baskets

For a truly modern Easter aesthetic, opt for lucite or acrylic baskets. These transparent containers create a futuristic look while allowing the colorful contents to shine through. Explore these ideas:

  • Choose baskets with clean, angular lines for a contemporary feel
  • Fill clear baskets with colorful Easter grass and eggs for a vibrant display
  • Stack acrylic baskets of varying sizes to create a tiered centerpiece
  • Customize clear baskets with modern decals or stickers for a personalized touch

Now that we’ve explored geometric Easter baskets, let’s move on to how technology can be integrated into your Easter decor for a truly cutting-edge celebration.

Tech-Integrated Easter Decor

Smart LED egg lights

Bring your Easter decor into the 21st century with smart LED egg lights. These innovative decorations offer a perfect blend of tradition and technology. Here’s why they’re a must-have:

  • Customizable colors: Change the hue to match your mood or decor theme
  • Programmable patterns: Create mesmerizing light shows
  • Remote control: Adjust settings from your smartphone
  • Energy-efficient: Use less power than traditional lighting

Place these smart eggs in clear glass bowls or scatter them around your living space for a modern, eye-catching display.

Digital Easter egg hunts

Transform the classic Easter egg hunt into an interactive, high-tech adventure. Use QR codes or augmented reality (AR) apps to create a digital scavenger hunt throughout your home or garden. This tech-savvy approach adds an exciting twist to the traditional activity and appeals to both kids and adults alike.

Projection mapping for egg displays

Take your Easter egg displays to the next level with projection mapping technology. This cutting-edge technique allows you to project intricate designs, animations, or even interactive elements onto plain white eggs or egg-shaped objects. Create a stunning centerpiece that captivates guests and showcases your creativity.

With these tech-integrated Easter decor ideas, you’ll impress your guests and add a modern flair to your holiday celebrations. Next, we’ll explore how to incorporate global-inspired accents into your Easter decor for a truly unique and diverse aesthetic.

Global-Inspired Easter Accents

Scandinavian minimalism

Embrace the clean lines and simplicity of Scandinavian design in your Easter decor. Opt for a muted color palette with whites, grays, and pale pastels. Incorporate natural materials like wood and linen for a cozy yet elegant feel. Display a few carefully chosen Easter eggs in a minimalist wooden bowl or on a sleek white tray.

Japanese wabi-sabi elements

Infuse your Easter decor with the Japanese aesthetic of wabi-sabi, which celebrates imperfection and transience. Use rough-textured ceramics for egg holders or vases. Arrange asymmetrical floral displays with cherry blossoms or delicate spring branches. Embrace the beauty of handmade items, such as irregularly shaped Easter eggs or hand-dyed fabrics.

Moroccan patterns and textures

Add a touch of exotic flair to your Easter celebration with Moroccan-inspired elements. Incorporate intricate geometric patterns in your table linens or egg designs. Use rich, jewel-toned colors like deep blues, vibrant oranges, and emerald greens. Display eggs in ornate metal or ceramic bowls with traditional Moroccan motifs.

Tropical Easter motifs

Bring a taste of the tropics to your Easter decor with vibrant colors and lush greenery. Consider the following ideas:

  • Use palm fronds or monstera leaves as placemats
  • Create a centerpiece with exotic flowers like orchids or bird of paradise
  • Decorate eggs with tropical fruit patterns like pineapples or flamingos
  • Incorporate natural materials like bamboo or rattan in your Easter baskets

By blending these global influences into your Easter decor, you’ll create a unique and culturally rich celebration that stands out from traditional designs. Each style offers a fresh perspective on Easter traditions, allowing you to explore new textures, colors, and patterns while honoring the spirit of the holiday.

Reimagining Easter with Modern Easter Decor Ideas

Easter decorating doesn’t have to be limited to traditional pastel colors and bunnies. Our collection of Modern Easter Decor Ideas showcases how you can celebrate the holiday with a contemporary twist. From minimalist egg displays to tech-integrated decorations, these fresh approaches breathe new life into your Easter celebrations.

By incorporating elements like sustainable materials, geometric shapes, and global-inspired accents, you can create a unique and stylish Easter atmosphere in your home. Whether you prefer a subtle nod to the holiday or a bold statement piece, these Modern Easter Decor Ideas offer something for every taste. Embrace creativity this Easter season and transform your space into a chic, festive haven that reflects your personal style.

Looking for even more inspiration? Browse our curated selection of Modern Easter Decor Ideas on our Pinterest board, where we regularly update with the latest trends and creative concepts to elevate your holiday experience.

Liked this article? You should check out:

10 Minimalist Decluttering Tips for a Fresh Spring Start

12-12-12 Decluttering: A Fun Decluttering Challenge to Try This Spring

April 11, 2025
0 FacebookTwitterPinterestLinkedinTumblrWhatsappTelegramEmail
Home OrganizationSeasonal

12-12-12 Decluttering: A Fun Decluttering Challenge to Try This Spring

by Emma Sinclair April 8, 2025
written by Emma Sinclair

Is your home feeling a bit crowded lately? You’re not alone! As spring approaches, many of us find ourselves surrounded by clutter that’s accumulated over the winter months. But what if there was a fun and simple way to tackle this overwhelming task? Enter the 12-12-12 decluttering that’s taking the organizing world by storm!

Imagine transforming your living space into a tidy, peaceful haven in just a few hours. The 12-12-12 decluttering offers a fresh, exciting approach to decluttering that turns a daunting chore into an engaging game. It’s not just about getting rid of things; it’s about rediscovering your space and creating room for what truly matters in your life.

Ready to embark on this decluttering adventure? In this blog post, we’ll dive into the ins and outs of the 12-12-12 Rule, from understanding its core principles to implementing it in various areas of your home. You’ll learn how to prepare for the 12-12-12 decluttering, make the most of your decluttering efforts, and even expand the concept to suit your unique needs. Let’s get started on your journey to a clutter-free, rejuvenated living space!

Understanding the 12-12-12 decluttering

Organized stacks of clothing with a notebook showing '12-12-12 RULE' for the decluttering challenge, next to a wall calendar.

A. Definition and concept

The 12-12-12 Rule is a simple yet effective decluttering challenge that can help you streamline your living space. Here’s how it works:

  1. Find 12 items to throw away
  2. Locate 12 items to donate
  3. Return 12 items to their proper place

This method provides a structured approach to decluttering, making the task less overwhelming and more manageable. By focusing on specific numbers, you can turn decluttering into a fun and rewarding game.

CategoryActionImpact
Throw awayDiscard 12 itemsReduces waste and clutter
DonateGive away 12 itemsHelps others and frees up space
ReturnPut back 12 itemsImproves organization

B. Origins of the challenge

The 12-12-12 Rule gained popularity through social media and minimalist lifestyle blogs. While its exact origin is unclear, it aligns with other decluttering techniques that emphasize simplicity and intentional living. This challenge resonates with people seeking practical ways to reduce clutter and create more organized living spaces.

C. Benefits of this decluttering method

You’ll find numerous advantages to adopting the 12-12-12 Rule:

  1. Manageable chunks: Breaking down decluttering into smaller tasks makes it less daunting
  2. Quick results: You can see immediate progress in your space
  3. Balanced approach: It addresses different aspects of clutter (trash, donations, and misplaced items)
  4. Versatility: Applicable to any room or area in your home
  5. Habit-forming: Regular practice can lead to long-term organizational skills

By incorporating this method into your spring cleaning routine, you’ll be well on your way to a more organized and clutter-free home. Now that you understand the basics of the 12-12-12 Rule, let’s explore how to prepare for this exciting challenge.

Preparing for the Challenge

Setting goals and intentions

Before diving into the 12-12-12 decluttering, it’s crucial to set clear goals and intentions. Ask yourself:

  • What do you want to achieve through this challenge?
  • How do you envision your space after decluttering?
  • What specific areas of your life will benefit from a more organized home?

By answering these questions, you’ll create a strong foundation for your decluttering journey. Remember, your goals should be SMART: Specific, Measurable, Achievable, Relevant, and Time-bound.

Gathering necessary supplies

To make your decluttering process smooth and efficient, gather these essential supplies:

  1. Storage bins or boxes
  2. Trash bags
  3. Labels and markers
  4. Cleaning supplies
  5. Donation bags
SupplyPurpose
Storage binsSorting items
Trash bagsDisposing of unwanted items
LabelsOrganizing and categorizing
Cleaning suppliesRefreshing decluttered areas
Donation bagsPreparing items for charity

Choosing your target areas

Identify the areas in your home that need the most attention. Consider:

  • High-traffic zones
  • Spaces that cause you stress
  • Areas with visible clutter

Prioritize these areas based on their impact on your daily life and the level of difficulty in decluttering them.

Creating a timeline

Now that you’ve set your goals and identified target areas, it’s time to create a realistic timeline. Break down your decluttering challenge into manageable steps:

  1. Set a start date
  2. Allocate specific days for each target area
  3. Schedule breaks to avoid burnout
  4. Set a completion date

Remember, the 12-12-12 rule is flexible, so adapt your timeline to fit your lifestyle and commitments. With your preparation complete, you’re now ready to implement the 12-12-12 rule and transform your space.

Implementing the 12-12-12 Rule

Woman implementing the 12-12-12 decluttering challenge, sorting clothes into keep, donate, and discard piles with labeled sticky notes.

Identifying 12 items to throw away

As you begin implementing the 12-12-12 Rule, start by identifying 12 items to throw away. Look for things that are broken, expired, or no longer serve a purpose. Consider the following categories:

  • Expired food items
  • Worn-out clothing
  • Broken electronics
  • Old magazines or newspapers
  • Empty containers
Item TypeExamples
KitchenExpired spices, chipped mugs
BathroomOld toiletries, empty bottles
OfficeDried-up pens, outdated documents

Selecting 12 items to donate

Next, focus on selecting 12 items that are still in good condition but no longer needed. These can be donated to local charities or given to friends and family. Consider:

  1. Clothing that no longer fits
  2. Books you’ve already read
  3. Duplicate kitchen gadgets
  4. Gently used toys
  5. Excess home decor items

Relocating 12 items to their proper places

Now, identify 12 items that are out of place and return them to where they belong. This step helps restore order and improves your home’s functionality. Look for:

  • Shoes in the living room
  • Coats on chairs
  • Tools left out after a project
  • Books on nightstands
  • Misplaced remote controls

Tips for making quick decisions

To streamline your decluttering process:

  1. Set a timer for each category
  2. Trust your instincts
  3. Ask yourself, “Have I used this in the past year?”
  4. Consider the item’s value vs. the space it occupies
  5. Remember, you’re aiming for progress, not perfection

With these guidelines, you’ll find implementing the 12-12-12 decluttering both efficient and effective. As you move through each category, you’ll notice your space becoming more organized and clutter-free. Now that you’ve mastered the implementation, let’s explore how to tackle different areas of your home using this method.

Tackling Different Areas of Your Home

Woman sorting household items into labeled bins for keeping and donating as part of a home decluttering project.

Bedroom decluttering strategies

Your bedroom should be a sanctuary for rest and relaxation. Start by sorting through your closet using the 12-12-12 rule:

  • 12 items to donate
  • 12 items to discard
  • 12 items to keep and reorganize

Next, tackle your nightstand and dresser drawers. Remove unnecessary items and organize essentials for easy access.

AreaDecluttering Tip
ClosetUse matching hangers for a uniform look
DresserFold clothes using the KonMari method
Under-bedUtilize storage containers for seasonal items

Kitchen organization tips

Your kitchen can quickly become cluttered with gadgets and utensils. Apply the 12-12-12 rule to your kitchen tools and appliances. Consider these strategies:

  • Group similar items together
  • Use drawer dividers for utensils
  • Install hooks for frequently used pots and pans

Living room refresh ideas

Create a welcoming space by decluttering your living room. Focus on:

  1. Organizing bookshelves
  2. Sorting through magazines and newspapers
  3. Decluttering entertainment centers

Use decorative baskets to store blankets and remote controls, keeping surfaces clear and tidy.

Bathroom clutter solutions

Bathrooms often accumulate unnecessary products. Apply the 12-12-12 rule to toiletries and beauty products. Implement these solutions:

  • Use drawer organizers for makeup and small items
  • Install a medicine cabinet for daily essentials
  • Utilize over-the-door storage for towels and robes

Home office organization

A clutter-free workspace promotes productivity. Tackle your home office by:

  1. Sorting through paperwork
  2. Organizing digital files
  3. Decluttering desk drawers

Use cable management solutions to keep cords tidy and invest in a filing system for important documents.

Now that you’ve tackled different areas of your home, let’s explore how to make the most of your decluttering efforts.

Making the Most of Your Decluttering Efforts

Proper disposal methods

Now that you’ve identified items to discard, it’s crucial to dispose of them responsibly. Here are some eco-friendly disposal methods:

  • Recycling: Sort recyclables like paper, plastic, and glass
  • E-waste collection: Take electronics to designated drop-off points
  • Hazardous waste disposal: Use special facilities for chemicals and batteries
  • Composting: Turn organic waste into nutrient-rich soil

Donation center options

Your unwanted items could be someone else’s treasure. Consider these donation options:

OrganizationWhat They Accept
GoodwillClothing, furniture, electronics
Salvation ArmyHousehold items, appliances, toys
Local sheltersToiletries, bedding, non-perishable food
SchoolsBooks, art supplies, sports equipment

Selling valuable items

Turn your decluttering efforts into cash by selling items you no longer need:

  1. Online marketplaces: List on eBay, Facebook Marketplace, or Craigslist
  2. Consignment shops: Great for designer clothing and accessories
  3. Yard sales: Perfect for miscellaneous household items
  4. Specialty buyers: For collectibles, antiques, or high-end electronics

Upcycling possibilities

Before discarding, consider giving items a new life through upcycling:

  • Transform old jars into decorative vases or storage containers
  • Repurpose wooden pallets into rustic shelving or outdoor furniture
  • Convert worn-out clothing into cleaning rags or quilts
  • Use broken ceramics for mosaic art projects

By maximizing your decluttering efforts through 12-12-12 decluttering, you’re not only simplifying your home but also contributing to a more sustainable lifestyle. Next, we’ll explore how to maintain your newly organized space.

Maintaining a Clutter-Free Space

Woman enjoying a decluttered, minimalist living room while folding a small stack of clothes in a bright, organized space.

Developing new habits

Now that you’ve successfully decluttered using the 12-12-12 rule, it’s time to focus on maintaining your clutter-free space. Developing new habits is crucial for long-term success. Here are some key habits to cultivate:

  • One in, one out: For every new item you bring home, remove one existing item
  • 10-minute daily tidy: Spend just 10 minutes each day putting things back in their place
  • Mindful purchasing: Ask yourself if you really need an item before buying it
  • Digital decluttering: Apply the same principles to your digital life, organizing files and emails

Creating organization systems

Efficient organization systems make it easier to maintain a clutter-free home. Consider implementing these ideas:

AreaOrganization System
ClosetColor-coded hangers
KitchenClear storage containers
OfficeLabeled file folders
BathroomDrawer dividers

Regular maintenance schedule

To keep your space tidy, establish a regular maintenance schedule:

  1. Daily: Quick 10-minute tidy-up
  2. Weekly: Deeper clean of one room
  3. Monthly: Reassess and declutter one area
  4. Seasonally: Rotate clothing and review stored items

Involving family members

Maintaining a clutter-free home is a team effort. Here’s how to get your family on board:

  • Assign age-appropriate tasks to children
  • Create a reward system for consistent decluttering efforts
  • Lead by example and explain the benefits of a tidy space
  • Make it fun with decluttering games or challenges

By implementing these strategies, you’ll find it much easier to maintain your newly decluttered space. Remember, consistency is key in developing these habits and systems. Next, we’ll explore how you can expand the 12-12-12 challenge to other areas of your life for even greater simplification and organization.

Expanding the Challenge

Weekly or monthly iterations

To keep the momentum going, you can adapt the 12-12-12 rule into weekly or monthly challenges. This approach allows you to maintain a clutter-free home throughout the year. Consider the following options:

  • Weekly 6-6-6: Choose 6 items to donate, 6 to trash, and 6 to relocate every week
  • Monthly 24-24-24: Expand the challenge to 24 items in each category per month
FrequencyDonateTrashRelocate
Weekly666
Monthly242424

Adapting the rule for larger spaces

For bigger homes or more extensive decluttering needs, you can scale up the 12-12-12 rule. Here are some ideas:

  • Room-by-room approach: Apply the 12-12-12 rule to each room individually
  • 20-20-20 challenge: Increase the number of items in each category to 20
  • Weekend warrior: Dedicate an entire weekend to a 50-50-50 challenge

Combining with other decluttering methods

Enhance your decluttering efforts by pairing the 12-12-12 rule with other popular techniques:

  1. KonMari Method: Use the “spark joy” concept when selecting items to keep or discard
  2. One-in-one-out rule: For every new item you bring in, remove one item from your home
  3. 90/90 rule: If you haven’t used an item in the last 90 days and don’t plan to use it in the next 90, consider letting it go

Seasonal variations of the challenge

Tailor the 12-12-12 rule to different seasons for a year-round decluttering strategy:

  • Spring: Focus on winter clothing and holiday decorations
  • Summer: Target outdoor gear and beach accessories
  • Fall: Declutter summer items and prepare for the upcoming holiday season
  • Winter: Clear out fall decor and make room for new gifts

By expanding the 12-12-12 rule, you can create a customized decluttering plan that suits your lifestyle and keeps your home organized throughout the year. Next, we’ll explore how to maintain your newly decluttered space and prevent future clutter buildup.

12-12-12 decluttering offers a fun and effective approach to decluttering your home this spring. By focusing on finding 12 items to throw away, 12 to donate, and 12 to return to their proper places, you can make significant progress in organizing your living space. This simple yet powerful method helps you tackle different areas of your home systematically, ensuring no corner is left untouched.

Remember, decluttering is not a one-time event but an ongoing process. Use the momentum gained from the 12-12-12 challenge to maintain a clutter-free space and consider expanding the challenge to other aspects of your life. By embracing this decluttering mindset, you’ll create a more organized, peaceful, and enjoyable living environment for yourself and your loved ones. Why not start your 12-12-12 journey today and experience the transformative power of decluttering?

Liked this article? You should check out:

  • 10 Minimalist Decluttering Tips for a Fresh Spring Start

April 8, 2025
0 FacebookTwitterPinterestLinkedinTumblrWhatsappTelegramEmail
Featured

10 Minimalist Decluttering Tips for a Fresh Spring Start

by Emma Sinclair April 1, 2025
written by Emma Sinclair

Spring is in the air, and with it comes the perfect opportunity for a fresh start. As you look around your home, does the clutter feel overwhelming? Minimalist decluttering tips can help you create the simpler, more organized living space you’ve been yearning for. You’re not alone in this struggle—many of us battle with the accumulation of unnecessary items, leading to stress and a sense of chaos in our daily lives.

Imagine walking into a home that’s clean, organized, and free from excess. A space where everything has its place, and you can breathe easier knowing you’re surrounded by only the things that truly matter. This isn’t just a dream—it’s achievable through minimalist decluttering. In this blog post, we’ll explore 10 practical tips to help you embrace minimalism and create a fresh, clutter-free environment for spring. From starting with a clean slate to maintaining your newly organized space, we’ll guide you through each step of the process. Are you ready to transform your home and your life? Let’s dive in!

Start with a Clean Slate

A. Assess your living space

Before diving into your decluttering journey, take a moment to evaluate your living space. Walk through each room with a critical eye, noting areas that feel cluttered or overwhelming. Pay attention to:

  • Surfaces that collect items
  • Overflowing storage spaces
  • Areas that cause stress or frustration

Use this checklist to guide your assessment:

  • Living room
  • Kitchen
  • Bedroom(s)
  • Bathroom(s)
  • Home office
  • Storage areas (closets, garage, basement)

B. Set decluttering goals

Now that you’ve assessed your space, it’s time to set clear, achievable goals. Consider the following:

  1. Specific areas to tackle
  2. Amount of items to remove
  3. Desired outcome for each space

C. Create a timeline for your spring cleaning

With your goals in place, develop a realistic timeline for your decluttering project. Break down larger tasks into manageable chunks and allocate specific days or time slots for each area. Consider factors such as:

  1. Your daily schedule and commitments
  2. The complexity of each decluttering task
  3. Any upcoming events or deadlines

Remember to be flexible and adjust your timeline as needed. The key is to maintain momentum without feeling overwhelmed. With a clear plan in place, you’re ready to tackle the next step in your minimalist spring cleaning journey.

The One-In, One-Out Rule

Minimalist decluttering tips

Implement the rule for new purchases

The One-In, One-Out Rule is a powerful strategy for maintaining a clutter-free home. To implement this rule effectively, follow these steps:

  1. Assess your current belongings
  2. Create a inventory list
  3. Set a “one-in, one-out” policy
  4. Evaluate new purchases carefully

By following these steps, you’ll ensure that your possessions remain manageable and purposeful.

Apply to clothing and accessories

Applying the One-In, One-Out Rule to your wardrobe is particularly effective. When you bring a new clothing item or accessory home, immediately select a similar item to donate or discard. This practice not only keeps your closet organized but also helps you curate a more intentional and versatile wardrobe.

Extend to home decor and gadgets

The rule can be easily extended to other areas of your home. For electronics, consider upgrading only when necessary and recycling old devices. With home decor, rotate seasonal items instead of accumulating more. This approach ensures your living space remains fresh and uncluttered while allowing you to enjoy new items guilt-free.

Embrace the 90/90 Rule

Identify unused items in the past 90 days

The 90/90 rule is a powerful decluttering technique that helps you make decisive choices about your belongings. Start by examining each item in your space and asking yourself, “Have I used this in the last 90 days?” Be honest with yourself and create two piles:

  1. Items used within the last 90 days
  2. Items not used within the last 90 days

This process will help you visualize how much of your stuff is actually serving a purpose in your daily life.

Evaluate if you’ll use them in the next 90 days

For items in the “not used” pile, ask yourself, “Will I use this in the next 90 days?” Consider factors such as:

  • Seasonal items (e.g., winter coats in summer)
  • Special occasion items (e.g., formal wear)
  • Sentimental value

Make decisions to keep, donate, or discard

Based on your evaluation, make decisive actions:

  1. Keep: Items you’ve used recently or will use soon
  2. Donate: Usable items that no longer serve you
  3. Discard: Broken, expired, or unusable items

Remember, the goal is to surround yourself with items that add value to your life. By applying the 90/90 rule, you’ll create a more intentional and clutter-free living space.

Now that you’ve tackled the 90/90 rule, let’s explore how to digitize your documents for even more space-saving benefits.

Digitize Your Documents

Minimalist decluttering tips

Scan important papers

In the digital age, there’s no need to keep piles of papers cluttering your space. Start by identifying essential documents such as:

  • Birth certificates
  • Tax records
  • Legal papers
  • Medical records

Use a high-quality scanner or smartphone app to create digital copies. Ensure the scans are clear and legible.

Organize digital files

Once you’ve scanned your documents, it’s crucial to organize them effectively:

  1. Create a logical folder structure
  2. Use descriptive file names
  3. Implement a consistent naming convention
  4. Add tags for easy searching

Safely dispose of physical copies

After digitizing, securely dispose of unnecessary physical documents:

  • Use a cross-cut shredder for sensitive information
  • Recycle non-sensitive papers
  • Consider professional document destruction services for large volumes

Remember to keep original copies of vital documents like birth certificates and marriage licenses. Store these in a fireproof safe or safety deposit box.

By digitizing your documents, you’ll free up physical space and have easier access to important information. This streamlined approach aligns perfectly with minimalist principles, helping you maintain a clutter-free environment. With your documents organized digitally, let’s move on to simplifying another crucial area of your home: your wardrobe.

Streamline Your Wardrobe

Create a capsule collection

A capsule wardrobe is the cornerstone of a streamlined closet. It consists of versatile, high-quality pieces that can be mixed and matched to create numerous outfits. Here’s how to build your own:

  1. Choose a color palette
  2. Select essential pieces
  3. Focus on versatility
  4. Limit accessories

Use the hanger trick

This simple yet effective method helps identify which clothes you actually wear:

  1. Hang all clothes with hangers facing the same direction
  2. After wearing an item, return it with the hanger facing the opposite way
  3. After 3-6 months, evaluate the untouched items

Donate or sell unused clothing

Once you’ve identified your unused items, it’s time to let them go:

  • Donate to local charities or shelters
  • Sell on online platforms or consignment shops
  • Host a clothing swap with friends

By streamlining your wardrobe, you’ll save time, reduce decision fatigue, and create a more organized space. With these techniques, you’ll be well on your way to a minimalist closet that reflects your personal style and needs.

Tackle the Kitchen Clutter

Pare down duplicate utensils

Start your kitchen decluttering journey by tackling those overflowing utensil drawers. Assess each item and keep only the essentials. Here’s a quick guide to help you pare down:

Remember, quality trumps quantity. Choose durable, multi-purpose utensils to maximize functionality while minimizing clutter.

Minimize single-use appliances

Single-use appliances often contribute to kitchen chaos. Consider these alternatives:

  • Replace bulky juicers with a multi-purpose blender
  • Swap specialized egg cookers for a versatile pan
  • Use a regular oven instead of a separate bread maker

By focusing on versatile tools, you’ll free up valuable counter and storage space.

Organize pantry with clear containers

Transform your pantry into a model of minimalist efficiency:

  1. Decant dry goods into clear, airtight containers
  2. Label each container clearly
  3. Group similar items together
  4. Use tiered shelving for better visibility

This approach not only looks sleek but also helps prevent food waste by keeping inventory visible and fresh.

With these strategies in place, your kitchen will become a streamlined, functional space that embodies minimalist principles. Next, we’ll explore how to apply these decluttering techniques to create a serene bathroom environment.

Simplify Your Bathroom

Declutter expired products

Start your bathroom simplification journey by tackling expired products. These items not only take up valuable space but can also be harmful to use. Here’s a quick guide to help you declutter:

  1. Check expiration dates
  2. Dispose of expired items properly
  3. Assess the necessity of remaining products

Minimize toiletries

After removing expired products, focus on minimizing your toiletries. Consider these strategies:

  • Opt for multi-purpose products
  • Choose quality over quantity
  • Stick to essentials and avoid impulse purchases

Organize with space-saving solutions

With a decluttered and minimized collection, it’s time to organize efficiently:

  1. Use vertical space with hanging organizers
  2. Invest in drawer dividers for smaller items
  3. Install floating shelves for frequently used products
  4. Utilize under-sink storage with stackable containers

By implementing these strategies, you’ll create a serene, clutter-free bathroom environment. This simplified space will not only look better but also make your daily routines more efficient and enjoyable. As we move forward, we’ll explore how to create a minimalist workspace, further extending the benefits of decluttering to your professional life.

Create a Minimalist Workspace

Clear desk surfaces

A clutter-free desk is the foundation of a minimalist workspace. Start by removing all items from your desk and sorting them into three categories: essential, occasional, and unnecessary. Keep only the essentials on your desk surface, store occasional items within reach, and eliminate or relocate unnecessary items.

Consider using the following organization strategy:

  1. Essential items: Computer, keyboard, mouse
  2. Occasional items: Notebook, pen holder, small plant
  3. Unnecessary items: Old documents, trinkets, excess stationery

Organize digital files and apps

Digital clutter can be just as distracting as physical clutter. Implement a system to organize your digital workspace:

  • Create a logical folder structure for your files
  • Use descriptive file names for easy searching
  • Regularly delete unnecessary files and empty the recycle bin
  • Uninstall unused applications
  • Organize your desktop icons into folders or remove them entirely

Implement a paperless system

Reducing paper usage not only declutters your workspace but also benefits the environment. Follow these steps to go paperless:

  1. Scan important documents and store them digitally
  2. Use cloud storage for easy access and backup
  3. Opt for digital invoices and receipts
  4. Utilize note-taking apps instead of physical notebooks
  5. Set up automatic bill payments to eliminate paper statements

By implementing these strategies, you’ll create a minimalist workspace that promotes focus and productivity. With a clear desk, organized digital files, and a paperless system, you’ll be well-equipped to tackle your work efficiently. Next, we’ll explore how to maximize storage efficiency throughout your entire living space.

Maximize Storage Efficiency

Use vertical space

When maximizing storage efficiency in a minimalist home, utilizing vertical space is crucial. By thinking upwards, you can significantly increase your storage capacity without cluttering floor space. Here are some effective ways to make the most of your vertical space:

  • Install floating shelves
  • Use over-the-door organizers
  • Hang pegboards for versatile storage
  • Mount wall-mounted cabinets

Invest in multi-functional furniture

Multi-functional furniture is a game-changer for minimalist living. These clever pieces serve multiple purposes, reducing the need for additional items and maximizing your space efficiency.

Implement the “everything has a home” rule

This principle is essential for maintaining an organized and clutter-free space. By designating a specific spot for each item, you’ll always know where things belong and can easily return them after use. This practice not only keeps your space tidy but also saves time in the long run.

Now that we’ve explored ways to maximize storage efficiency, let’s look at how to maintain your newly organized minimalist space.

Maintain Your Minimalist Space

Schedule regular decluttering sessions

To maintain your minimalist space, it’s crucial to establish a routine for decluttering. Set aside time each week or month to reassess your belongings and keep your space organized. Here’s a simple schedule you can follow:

By sticking to this schedule, you’ll prevent clutter from accumulating and maintain the peaceful atmosphere of your minimalist home.

Practice mindful consumption

Mindful consumption is key to preserving your minimalist lifestyle. Before making a purchase, ask yourself:

  • Do I really need this item?
  • Will it add value to my life?
  • Does it align with my minimalist goals?

By being more intentional with your purchases, you’ll naturally reduce the influx of unnecessary items into your home.

Enjoy your simplified living space

The ultimate goal of minimalism is to create a space that brings you joy and peace. Take time to appreciate the benefits of your decluttered home:

  • Reduced stress from a tidy environment
  • More time for activities you love
  • Easier cleaning and maintenance

Remember, minimalism is a journey, not a destination. Continuously evaluate your space and habits to ensure they align with your evolving needs and lifestyle.

Minimalist decluttering tips

Decluttering your living space using these minimalist tips can transform your home and mindset for a fresh spring start. By implementing strategies like the one-in, one-out rule, embracing the 90/90 principle, and digitizing documents, you’ll create a more organized and peaceful environment. Streamlining your wardrobe, tackling kitchen clutter, and simplifying your bathroom will further enhance your minimalist journey.

Remember, the key to maintaining a clutter-free space is consistency and mindfulness. Create a minimalist workspace, maximize storage efficiency, and regularly assess your belongings to keep your newly organized space intact. As you embark on this minimalist adventure, you’ll likely find that less truly is more, leading to increased productivity, reduced stress, and a renewed sense of calm in your daily life.

Continue Reading
April 1, 2025
0 FacebookTwitterPinterestLinkedinTumblrWhatsappTelegramEmail

Recent Posts

  • 8 Must-Have Items for a Backyard BBQ Setup

    July 9, 2025
  • 10 Chic Outdoor Patio Decor Ideas for Summer Gatherings

    June 27, 2025
  • 10 Easy Grilling Ideas to Try This Summer: Quick, Budget-Friendly Recipes for Perfect Cookouts

    June 25, 2025
  • 10 Cool Summer Door Wreaths to Welcome Guests in Style

    June 23, 2025
  • 10 Modern Easter Decor Ideas

    April 11, 2025

Categories

  • Featured
  • Lifestyle
  • Home Organization
  • Seasonal
  • Summer
  • Food
  • Home Organization
  • Featured
  • Crafts
  • Fashion
  • Lifestyle

@2025 - All Right Reserved. Designed and Developed by GrowUrBiz


Back To Top
Inspired Lifestyle Hub
  • Home
  • Crafts
    • 10 Cool Summer Door Wreaths to Welcome Guests in Style
  • Fashion
  • Food
    • 8 Must-Have Items for a Backyard BBQ Setup
    • 10 Easy Grilling Ideas to Try This Summer: Quick, Budget-Friendly Recipes for Perfect Cookouts
  • Lifestyle
    • 10 Chic Outdoor Patio Decor Ideas for Summer Gatherings
  • Summer
  • Home Organization